TYRE MAINTENANCE
from the Austin magazine February 1936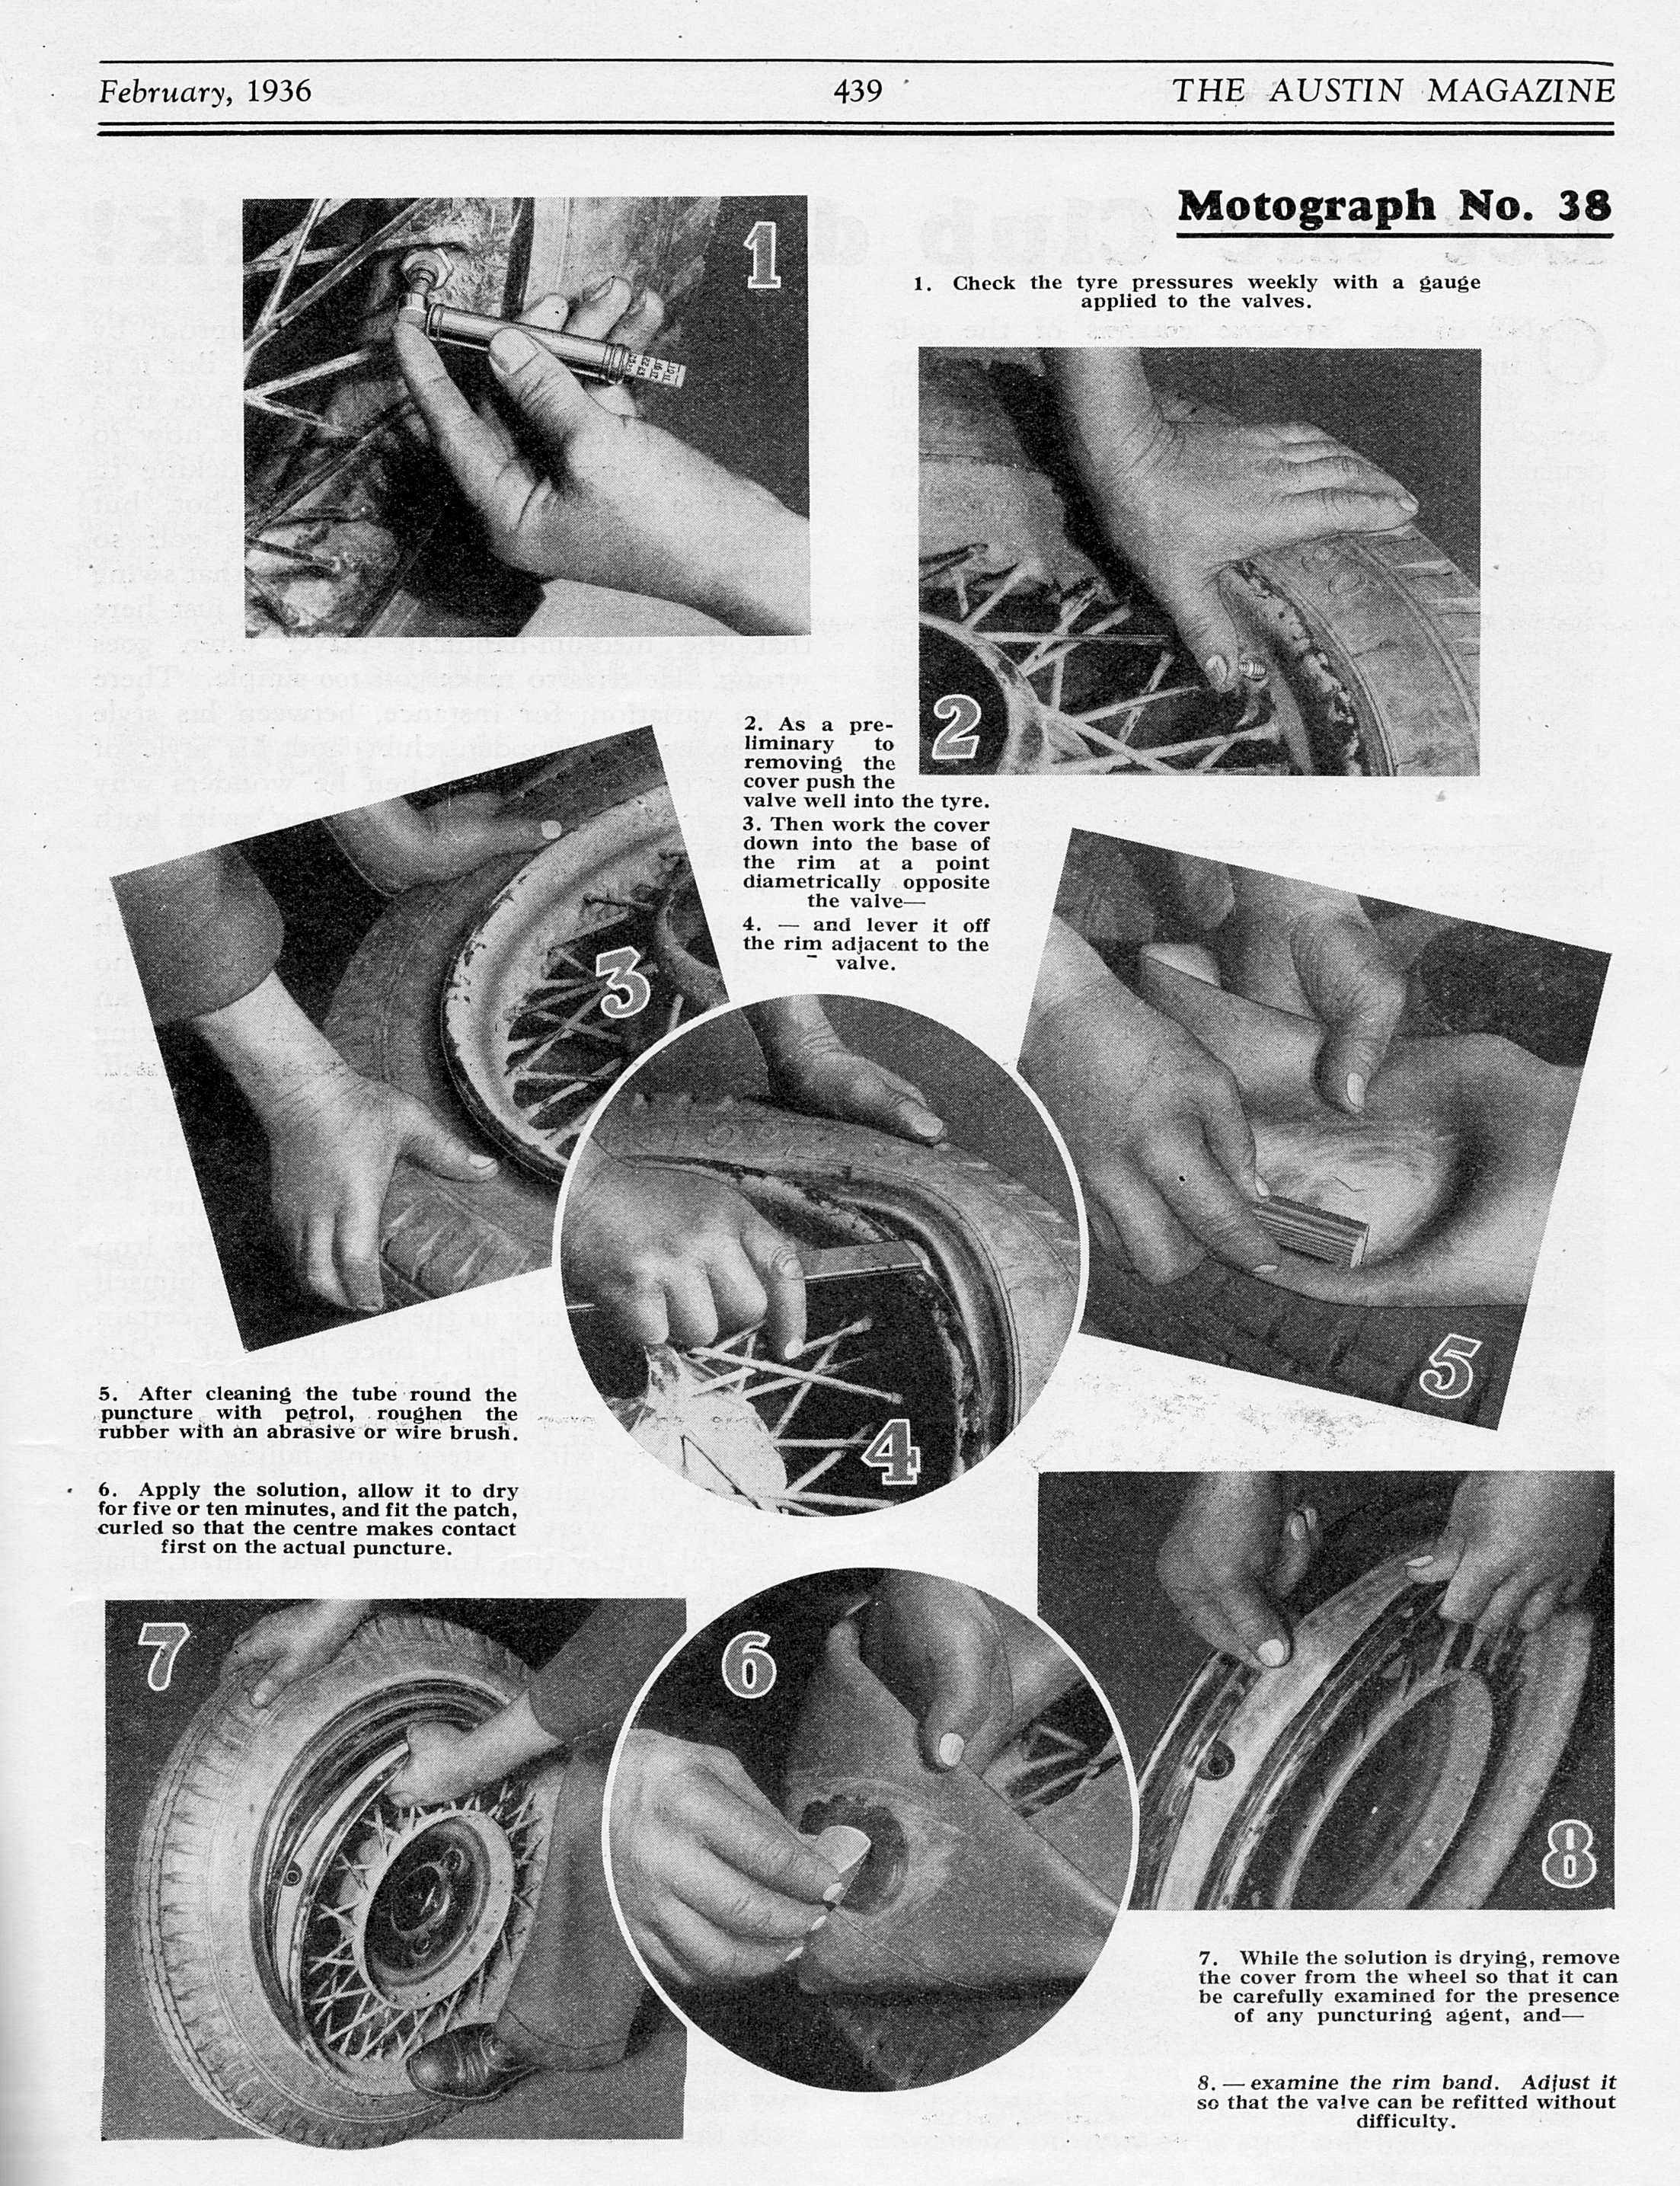
The tyre pressures should be checked each week, without fail, with a gauge applied directly to the valves, and more air given if necessary to make up for the loss. We give a table of tyre pressures for all current Austin models.
Another attention which should be given fairly frequently is examination of the tyre treads for cuts or embedded flints, which should be picked out before they work into the tyres.
The small cuts can be readily filled with a stopping compound, after being cleaned with petrol, but extensive cuts, or any incision deep enough to expose the cord foundation of the tyre, should be vulcanised, which is the work of an expert repairer with equipment. This should be done as soon after discovery as possible, as the cords adjacent to the cut will rot if water is allowed to reach them.
Oil or grease is also harmful if allowed to remain on the tyres, and it should be promptly removed with petrol, sparingly used, for petrol itself is a solvent of rubber. Paraffin should not be used.
Although in these days it is rare to have two punctures in succession to find the driver without a spare, it is as well for every owner to know how to repair a puncture should this emergency arise. But, before it is assumed that a puncture is, the cause of deflation, it is as well to examine the' valve, as the valve-inside may be at fault, in which event the trouble can be easily remedied by fitting a new inside or turning it lightly so that it can make a new seating. This part in any event, is likely to require replacement annually, and it is as well to have spares handy.
The valve inside is easily unscrewed for removal, either by the slotted top of the valve cap, or by the special key provided, according to type. If the valve seems to be in order examine the cover for visible signs of the puncture and, if located, mark the tyre wall for future reference. Then unscrew the valve nut from the valve body and push the valve into the tyre. Unless the puncture is peculiarly placed, the outer edge of the tyre should be removed from the rim for access to the tube, as then the wheel will rest flat on the ground, with the hub centre uppermost, while the work is in progress: First break the contact of tyre and rim and work the tyre edges into the base of the rim at a point diametrically opposite the valve. The rim base serves as a reduced diameter and, on inserting a small tyre lever under the edge of the cover near the valve, the cover can be levered over the rim edge. Force, which might damage the cover is quite unnecessary for this operation if the part of the cover diametrically opposite to the valve is kept well down in the rim base. The lever can next be worked round the rim to bring an arc of the tyre cover outside until the test of the cover edge can be pulled off by hand. The next requirement is to determine the location of the puncture, if not already discovered. The mark previously made on the tyre wall will help in this respect, but if the puncture is a slow one and cannot be detected with certainty, it may be necessary to inflate the tube and immerse it in water so that the leak is rendered apparent by the escaping bubbles. When a substantial puncture occurs, as from a nail or suchlike, it is well to examine both sides of the tube, as there may be another puncture.
The actual preparation of the damaged area of the tube for the reception of the patch is best done with a wire brush or a piece of glass paper. In an emergency, the abrasive surface of the edge of a box of non-safety matches will do. This mechanical roughening of the surface of the rubber provides an excellent grip for the solutioned patch and will enable it to adhere more closely than when the surface is prepared merely by cleaning with petrol. The solution can then be applied evenly round the puncture, and if allowed to dry for five or ten minutes the adhesion of the patch will be so much the better. After detaching its backing, curl the selected patch slightly so that its centre touches the middle of the solutioned area first. Then release the patch and press onto the tube with the thumbs working from the centre outwards. When dusted with a little French chalk, the tube is ready for replacement in the cover, providing the interior of the cover has been thoroughly examined and the puncturing agent located.
A bad gash in the tube should not be patched, but left to a vulcanising expert to repair.
The rubber rim band should be examined and replaced if it has been damaged by the spoke heads. Rusty places in the rim should be rubbed down and, if time permits, brushed over with a little black lead or graphite.
To reassemble, inflate the tyre slightly, replace the tyre valve through its hole in the rim and place the tube evenly inside. Then fit the edge of the cover starting from a point diametrically opposite the valve, again pushing it down into the base of the rim until the last inch or two of its periphery can be levered over the rim by the valve. A glance round each side of the rim, pressing the tyre edge away from it, will reveal if the tube has been nipped and a bounce or two on the floor will allow the tube and cover to settle into their correct relative positions.
The guide rings on the outer walls of the tyre should then, as previously mentioned, be concentric with the wheel, and all that remains to be done is for the tube to be fully inflated to its correct pressure and the valve cap refitted.