ROPEY SNOW CHAINS:: As well as carrying a spade, candle and a box of matches (as recommended by the RAC) it is well to carry a couple of lengths of rope. You can use these as snow chains by wrapping them around your tyres and rims.
GRIT: A plastic one gallon container filled with grit can be sprinkled on snow and icy ground. A must for any motorist!
GENERAL WINTER JOBS: Alhough it's been a mild winter so far don't forget to add antifreeze, this not only stops freezing but it has anti corrosion properties as well, use only the blue type in your austin7. Make sure your brakes are in tip top order and adjusted correctly, And most important, check your tyres for tread depth and for cracks in the side walls. Check tyre pressures, Austin recommend 22lbs sq.inch in the front and 24 lbs sq. inch in the back. Also check oil levels in the engine, gearbox and don't forget the back axle. Check all lights are working properly. Enjoy safe, happy motoring. Glyn
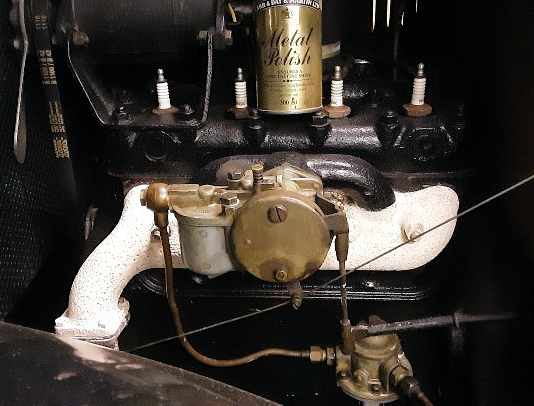
SHINY EXHAUST MANIFOLD: Rusty exhaust manifold letting down appearances under your bonnet? Try this little tip. Run the engine to warm the manifold then using an old paintbrush carefully dab the manifold with liquid metal polish and allow to dry. A couple of coats may be necessary to get the look shown here.
Geoff Kingsland DA7C
HELICOILS:
are supplied as a kit with the correct drill, tap and insert tool
everything you need but at
Bolt size Helicoil drill size Helicoil drill size 3/16 4.9
5 1/4 6.6 6.7 5/16 8.3 8.4 3/8 9.8 9.8 7/16 11.4 11.4 1/2 12.9 12.9 9/16 14.5 14.5 5/8 16.1 16.5 3/4 19.3 19.7
an
eyewatering price (£73.59 including 20% discount). For this you
get 10 helicoil inserts so I guess at £7.35 per repaired hole it is not
too bad. With the kit (incidentally now marketed as Armstrong Precision
Components Armacoil Thread Repair Kit, Helicoil to you and me) came a
table of drill sizes which I list below. To drill out prior to tapping
for the Helicoil insert, very little extra metal has to be removed –
really just the removal of the remnants of the old threads. This
compares well with tapping out to the next size up. The special tap
supplied is quite short and well tapered, so care is required to keep it
running straight and to avoid too much swarf build up. The helicoil
inserts went in easily using the insert tool. The inserts are
effectively springs and the tool slightly compresses them so they wind
in easily. On release of the tool they grip tight. John Miles (DA7C)
BSF mm
BSW mm
 flat
face taking the force in the groove, i.e. away from the cause of the
pressure the circlip is trying to stop.
Vince Leek
flat
face taking the force in the groove, i.e. away from the cause of the
pressure the circlip is trying to stop.
Vince Leek 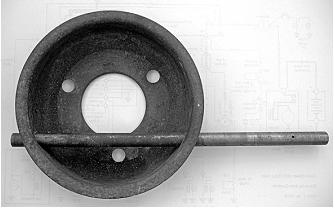
RUNNING PROBLEMS: Q I had an Austin 'Seven' decarbonised about two months ago. Afterwards, I found that it was pulling very well, but had a tendency for the engine to stop while negotiating lefthand corners. This tendency is gradually increasing, so that now it is almost impossible to rev. the engine in order to change up or down, or, when changed down, to pick up until the car is once more on a straight course. I do not want to readjust the carburettor, which is a standard vertical 'Zenith' unless this is necessary, as in all other cases the car pulls remarkably well and does 4045 m.p.g. G.M.S.(Minehead) A The controls on your car are partly seized in the steering column and counteract any pedal movement you may make on the throttle. Disconnect the arm from the bottom of the column and test this. It is the only part that can have an effect on the carburettor. From the Practical Motorist Magazine.
REAR VIEW MIRROR AND THE MOT: If your only rear view mirror is only fixed to the windscreen by suction alone and the tester noticed it, then your car would probably fail the MOT. [MOT Inspection Manual Rule 8.1 View to Rear and 9.8 Drivers View of the Road] Vince Leek
At Munwellyns we have tried various methods to alleviate leaks over the years, generally we find that provided surfaces are clean, flat and completely free of contamination we still tend to use traditional paper gaskets using a smear of Loctite 5980 gasket sealer on both sides of the joint. This is a black silicone looking compound available in tubes. We generally assemble, pinch tight and after a short time fully tighten down once the paste has gone off a while. When fitting the rear main housing be careful not to apply too much compound near the crankcase rear oil return hole, many a c/case we have found this hole blocked with compound!
With the recent advent of Teflon gaskets available for certain joints from Jamie at the 7 Workshop, we have followed his instructions, so far with continued success.
The cylinder base gasket: both bottom of block and crankcase mating surface must be completely contamination free we generally clean with cellulose thinners. Assemble without ANY jointing compound and just nip up nuts. Leave a short while (over lunch) and tighten down. Leave again (overnight if time permits) and fully tighten home, then adjust tappets.
The Teflon later tappets’ cover strip: notice it is shaped to fit in the cover lip. Apply Loctite compound into cover lip and let it go off a while before setting the Teflon joint into it and try to fit cover before it jumps back out or leave the cover plate on the bench face down and weighed down letting the compound dry off, then fit to engine.
The new Teflon sump gasket: like most rubber gaskets, Loctite paste one mating surface, fitting the gasket accurately to that surface and let dry. Then offer the other component to it WITHOUT any further compound. and tighten, not stupidly tight. This method should ensure the gasket does not slide away as you tighten.
New copper head gaskets: especially lately we have found, after a short while, you need to retorque new head gaskets. They seem to settle a lot and if you do not, you will end up with a blown gasket just when you don’t need it!! Gary Munn DA7C
SMELLY GARAGE/SMELLY CAR: Does your A7 and car garage smell of old oil? It may be time to give the engine a bit of a wipe down and remove some of that spare oil you are carrying stuck to the engine, gearbox and back axle. While you are doing that it may be time to clean out the oil in any drip trays under the car. You might be surprised the difference it makes. But don’t go too far as a bit of oil does stop rust! Douglas Alderson DA7C
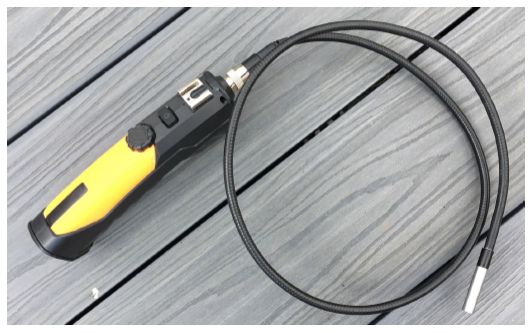
ENDOSCOPE: Looking on the internet, I see that they are
 as
cheap as £6 and can be up to 10m long. The one I have connects to my
iPhone via an app and will let you see the live images on the phone and
also record a video to take photos. The end of the camera has
as
cheap as £6 and can be up to 10m long. The one I have connects to my
iPhone via an app and will let you see the live images on the phone and
also record a video to take photos. The end of the camera has%20photo.jpg) powerful led lights and also comes with a small magnet and hook
attachment for the end, so if you have lost something you can use the
camera to find it.
powerful led lights and also comes with a small magnet and hook
attachment for the end, so if you have lost something you can use the
camera to find it.Examnple of use looking in though the access hole in the top of the gear box at the clutch levers.
COLD STARTING:When cold, always turn the engine over on the handle to circulate oil before starting. DA7C TECH FORUMDEGREASING: My local mechanic mates suggested using spray on brake cleaner to degrease engine parts. Simply spray on and wipe off afterwards. It seems to work far better than the degreasers you buy and then have to hose or jetwash off. It can be purchased in motor factors or Screw Fix in spray cans or for larger jobs, in 5 litre containers. Simply decant it into one of those pressure spray pots, like you used to use for the roses. Gary Munn DA7C
1. Clean everything
with brake cleaning fluid and light abrasive paper to a shiny finish.
2. Apply load of flux
both inside the nip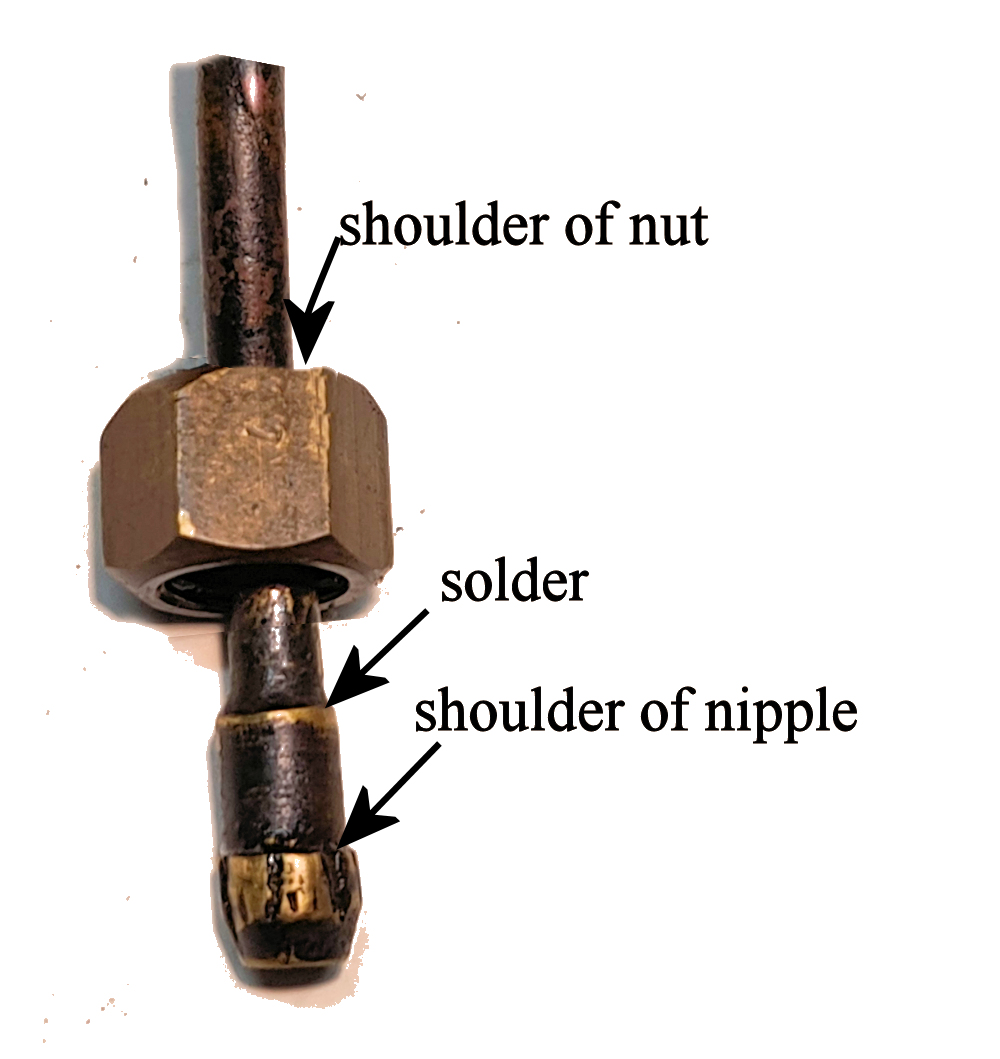 ple
and out.
ple
and out.
3. Make sure both
nuts are still on the pipe and the right way round.
4. Push the nipple
firmly over the end of the pipe.
5. Apply heat from
the bottom of the nipple whilst touching the top of the nipple with
solder wire and the solder will disappear in between the nipple and pipe
by capillary action. Simple!
6. This is where my
troubles started! It didn’t look as if there had been enough
solder so I put a load more around the top of the nipple where it met
the pipe just to be sure.
7. I then spent a
good half hour re-threading the pipe up through the instrument panel and
was ready to attach the nipples with their nuts.
8. NUTS WON’T FIT.
What I hadn’t realised was that the inside shoulder of the nut slides
over the shank of the nipple right down to the shoulder of the nipple,
not where it joins the pipe. Having put on an extra layer of
solder, the nuts couldn’t now go over the top of the nipples as it’s a
very tight fit. At this point there
are two options – take out the pipe and start again (the proper way to
do it) or try to file down the excess solder with a needle file until
the nut could slide over the shaft of the nipples (the bodger’s w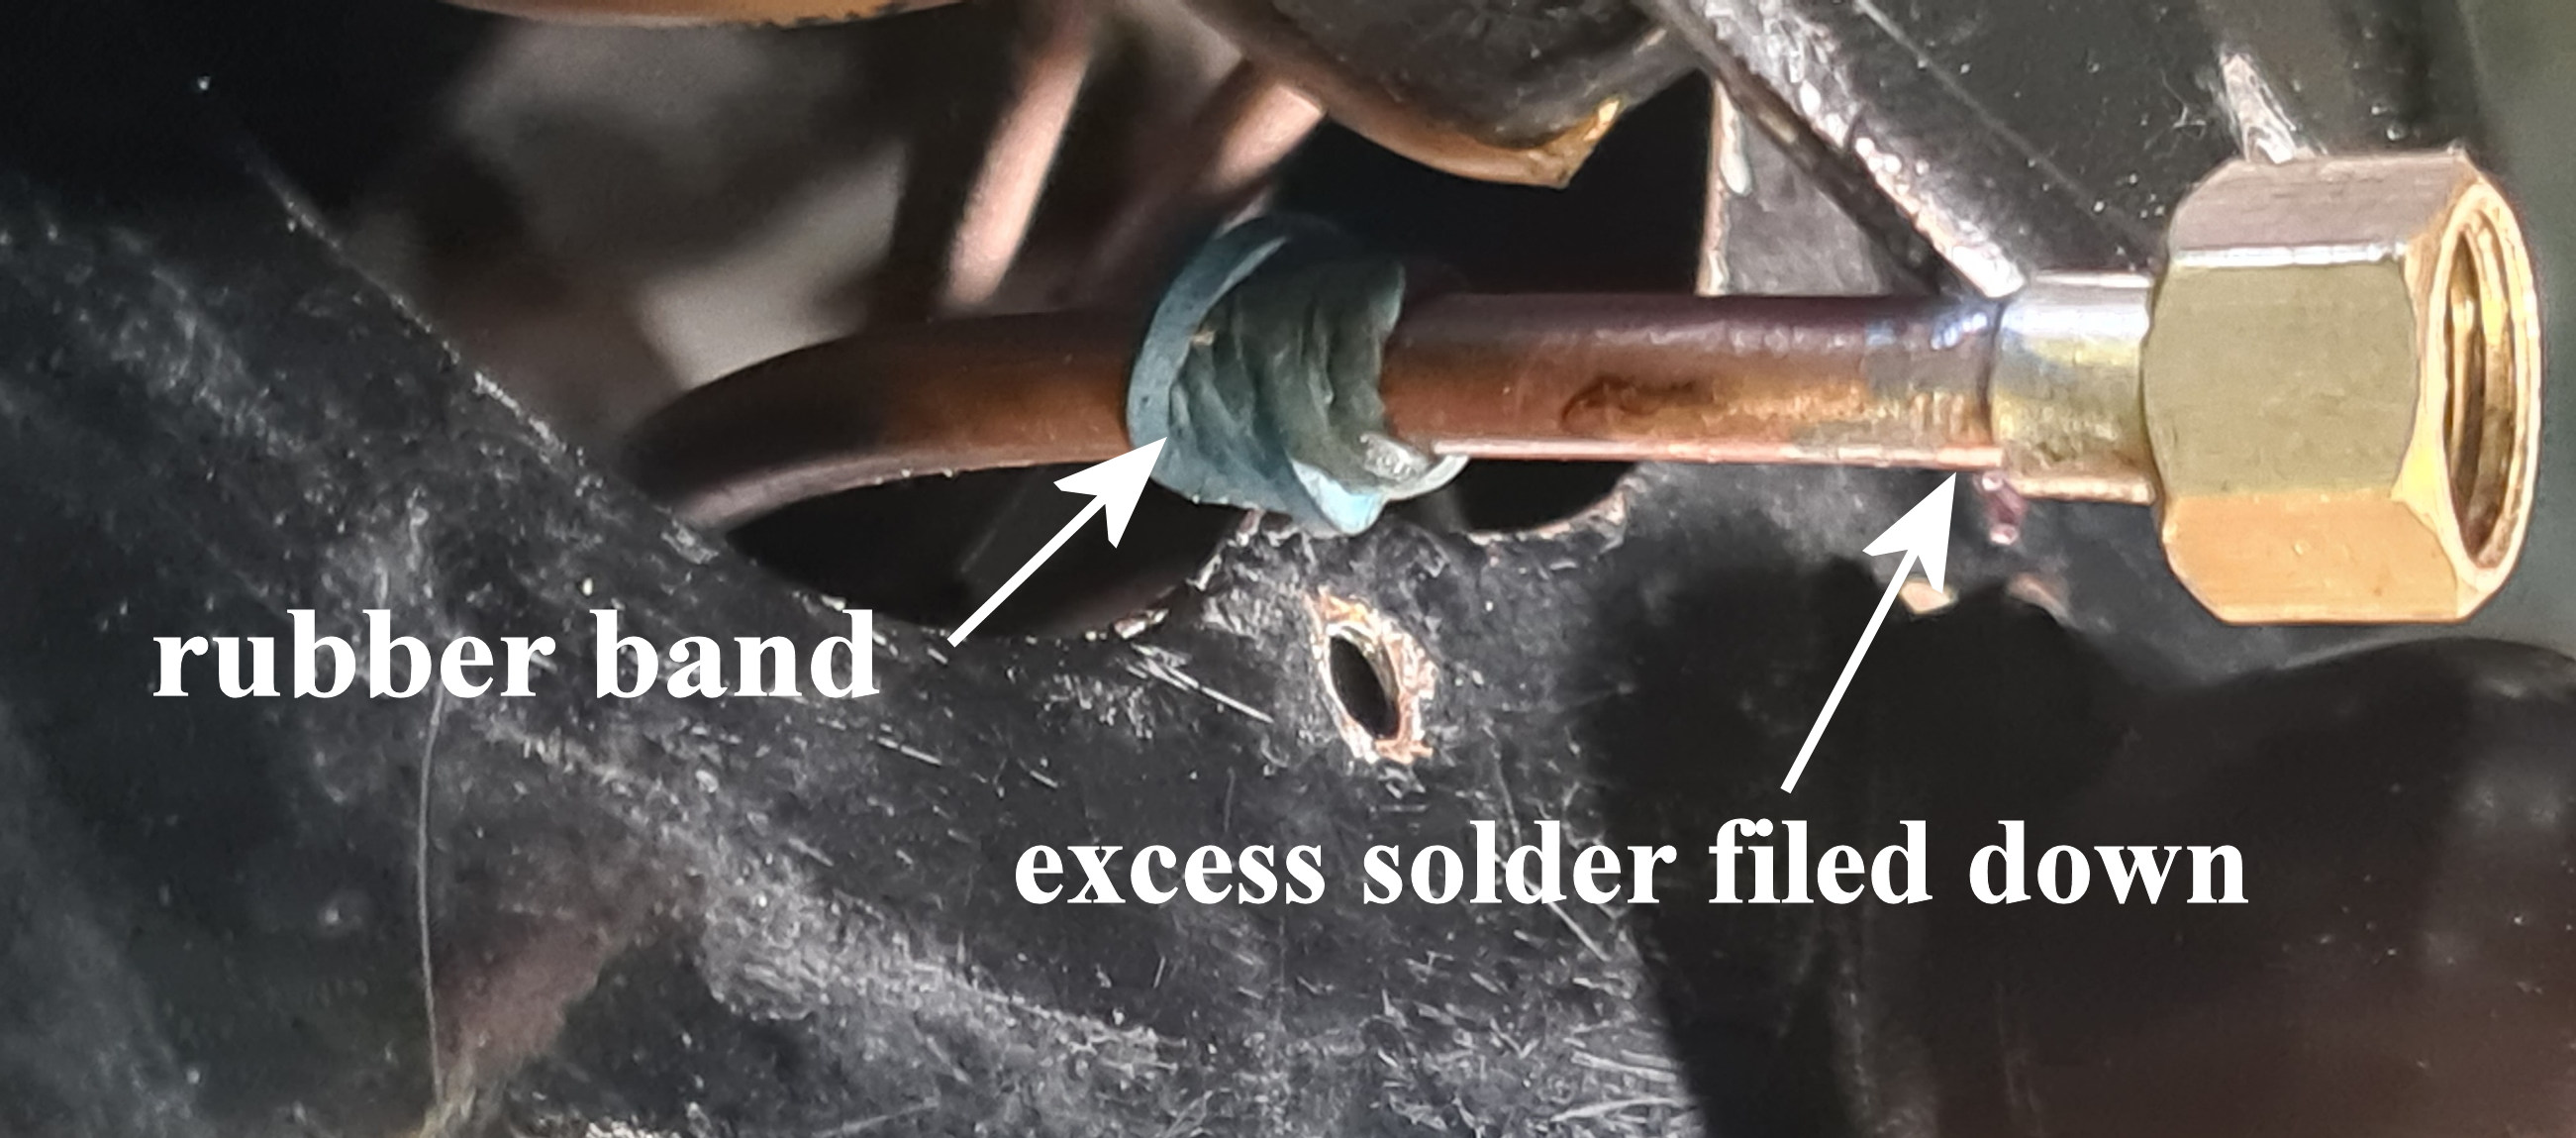 ay).
I won’t say which way I chose but just to say it probably took a lot
longer than the ‘proper way’).
ay).
I won’t say which way I chose but just to say it probably took a lot
longer than the ‘proper way’).
9. One little tip
that probably everyone else knows – to stop the nut sliding back down
the pipe whilst trying to match the nipple to the oil pressure gauge
behind the instrument panel, twist a rubber band over the pipe once
you’ve got it through the grommet and where you can get to it behind the
panel.
10. It’s easy once you know how!!
David Whetton DA7C