Modern car suspensions are now so advanced
that almost any surface will result in a smooth ride. The local councils have
not been slow to exploit this fact and as a consequence road repairs have been
to a very low standard, leaving the rest of us with our local roads probably in
a worse state than when our cars were new! It is now more important than ever to
regularly inspect and maintain the front axle and the various components for
wear and fatigue. High-grade materials were used throughout but only to the
minimum dimensions, leaving the design as a whole a little on the weak side. If
you are not sure what to look for, any of the more experienced members will be
glad to point out the shortcomings of the design which are all well known. We
are looking here at axles that are generally sound that have been rebuilt in the
recent past, and for reasons of poor assembly or settlement of ‘high’ spots have
developed clearance between axle and stub axle surfaces. This can put excessive
bending strain on the already weak kingpins and set up a hammering action as
rough roads are traversed. The MOT man will check for this, and it will be a
failure point.
Check for wear
Check for wear in the kingpins and axle eyes by jacking up the car and rocking the wheel from top to bottom. If all is well check the up and down movement by levering under the tyre with a suitable bar, if movement is found, let the car down and measure the gap between the top of the axle and the underside of the stub axle with feeler gauges. It will be most likely that the near side will have worn more than the off side due to grit at the roadside being thrown up into the grease forming a grinding paste. I have just done this job on my Chummy and found a 10 thou gap on the O/S and 37 thou on the N/S!
Removal
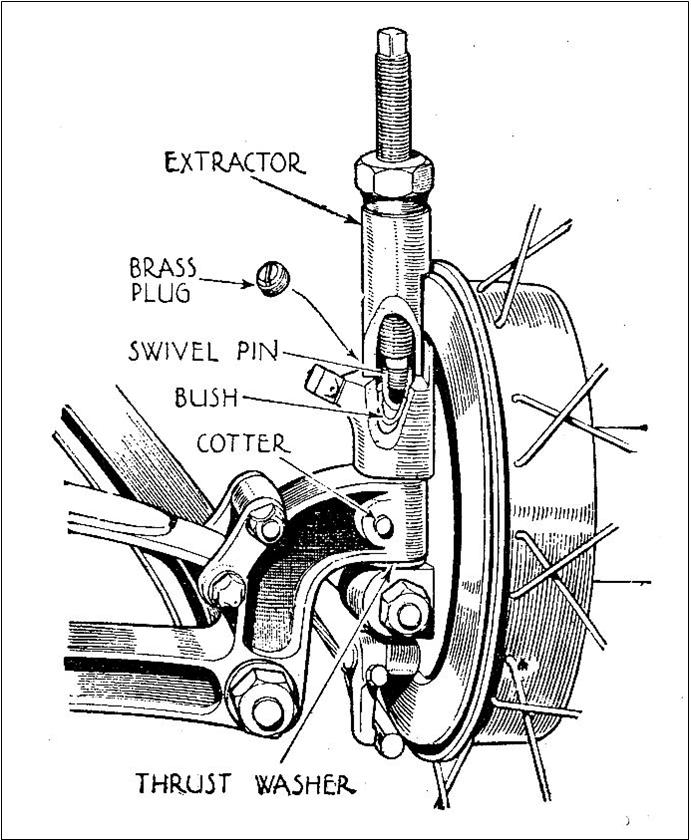
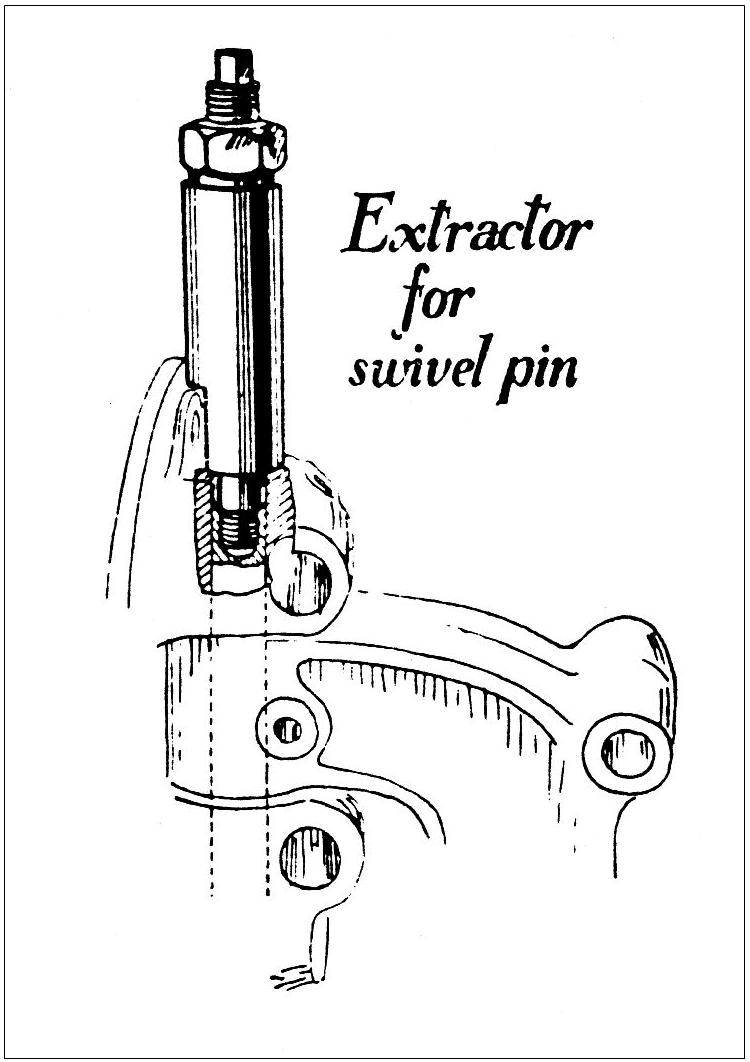
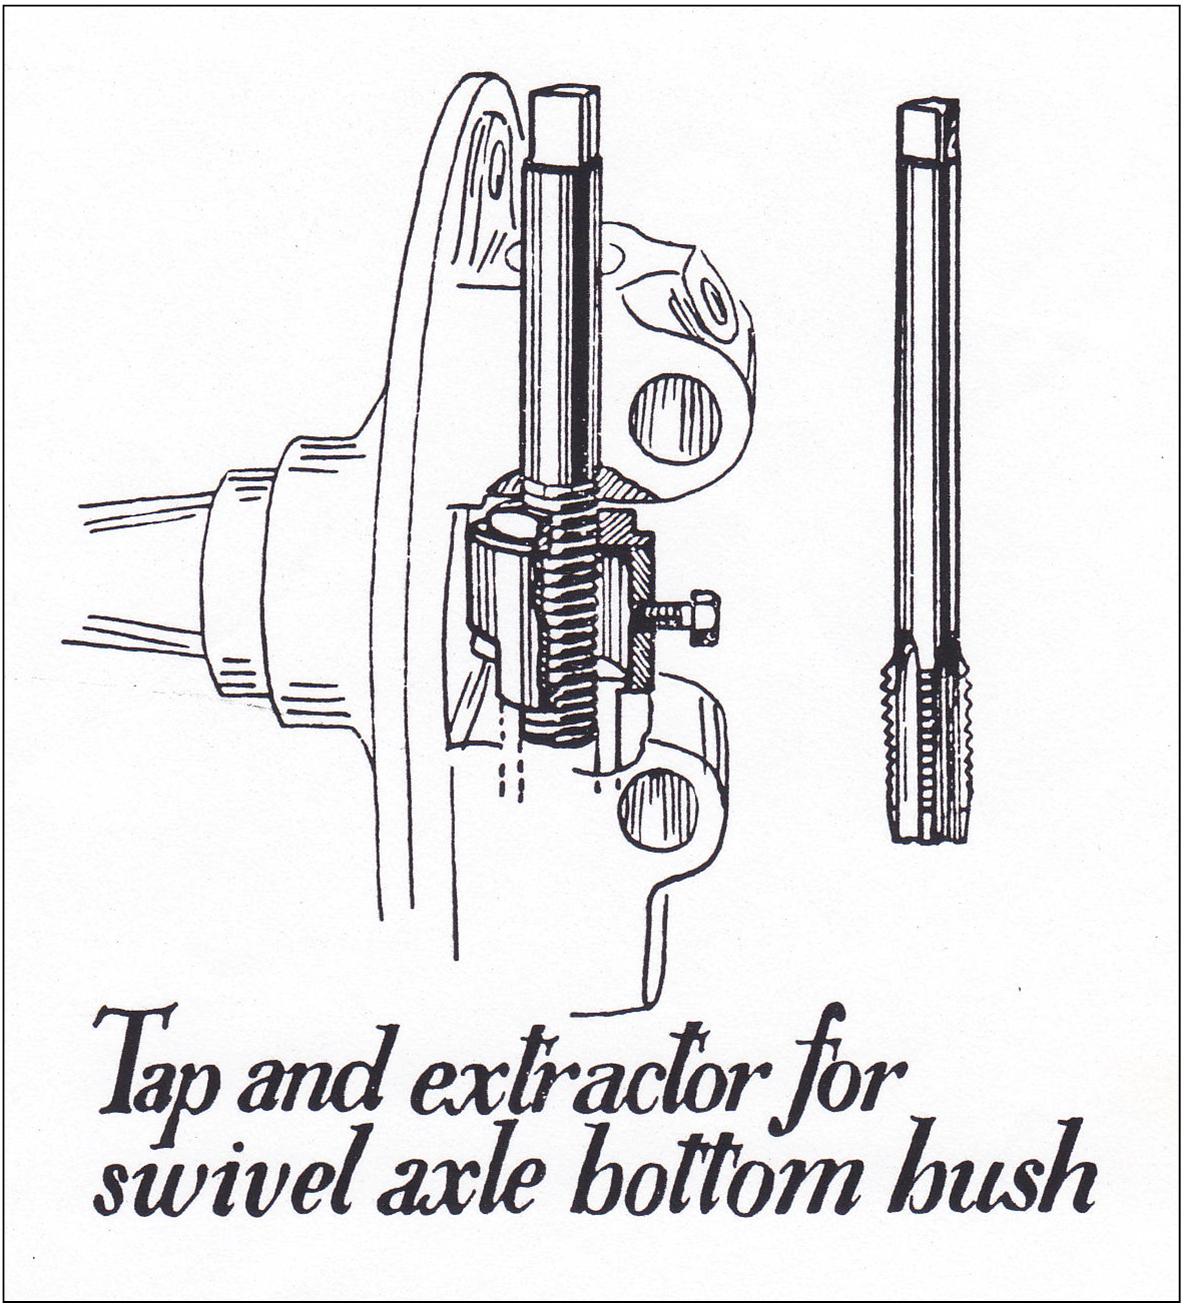
Removal of the kingpins can be tackled in various ways depending on the maintenance history. Start by releasing the hand brake to take the strain off the cable and loosen the nut on the cotter and give it a slight tap to release the pressure on the pin (note this pin is not a cycle type cotter and can only be removed when the kingpin has been removed). After removing the plugs you will observe a 5/16” B.S.F thread in the middle of the pin. If like me you have been a regular ‘greaser’ you will probably find that you can fit a bolt into the thread and tap out the king pin from under the bolt head with a large screwdriver. If trouble is experienced you can make up a simple puller with threaded rod and a piece of tube, or my favorite is a simple slide hammer with a thread on the end. If your pins require more drastic action to remove it is more likely that your axle needs more work than the thrust washers we are dealing with here. With the pin removed the stub axle can be swung away outwards complete with drag link, track rods, brakes and hubs all left in situ, (pre-Girling axles only. I think Girling axles would need some or even all of the components mentioned removed first).
Fitting a steel washer
Depending on what your measurements were, you have
the choice of fitting a steel washer filed to size or shim material cut to a
washer shape. As far as I know none
 of
the Austin 7 spares providers stock graduated washers for this purpose, which is
strange seeing all axles would need them. I’m not keen on stacks of shims, so
would go for a filed washer on anything over 15 thou which is about as thick as
I can cut with hand tools. For anyone who has never done it, both of the above
choices can be difficult to perform without a cut finger or two at best. For
shims up to 15 thou, clamp two half inch washers either side of the shim into
the vice, adding a small G clamp to the top, chain drill the inside diameter and
file the washers, or if you live dangerously just blast a half inch drill
straight through the middle, but make sure the vice ‘IS’ tight. Remove, cut
outside diameter to match that of the thrust washer below the axle with snips or
sharp scissors and, very important, deburr. For filing washers I use a piece of
hardwood with a half inch hole drilled squarely through and an old gudgeon pin
tapped into it, if it’s a tight fit you can set it to stick up at say 36 thou,
put the washer over it and file down until you hit the pin. I finish off by
putting the washer on a magnet and polishing on an oilstone for final accuracy.
of
the Austin 7 spares providers stock graduated washers for this purpose, which is
strange seeing all axles would need them. I’m not keen on stacks of shims, so
would go for a filed washer on anything over 15 thou which is about as thick as
I can cut with hand tools. For anyone who has never done it, both of the above
choices can be difficult to perform without a cut finger or two at best. For
shims up to 15 thou, clamp two half inch washers either side of the shim into
the vice, adding a small G clamp to the top, chain drill the inside diameter and
file the washers, or if you live dangerously just blast a half inch drill
straight through the middle, but make sure the vice ‘IS’ tight. Remove, cut
outside diameter to match that of the thrust washer below the axle with snips or
sharp scissors and, very important, deburr. For filing washers I use a piece of
hardwood with a half inch hole drilled squarely through and an old gudgeon pin
tapped into it, if it’s a tight fit you can set it to stick up at say 36 thou,
put the washer over it and file down until you hit the pin. I finish off by
putting the washer on a magnet and polishing on an oilstone for final accuracy.
Reassembly
Put your new washer on the top of the axle and
maneuver the stub axle assembly into position. A dummy king pin with a pointed
end and a 90 degree handle is handy here to push down to centralize the washer
stopping just short of the lower part of the stub axle. Provided you have done a
good job you should be able to insert the standard thrust washer above the lower
bronze bush, hopefully with a very slight tapping fit. Anything more and it’s
back to the magnet and oilstone to take off a couple of thou more off the top
washer or make a new shim. Don’t be tempted to alter the original bottom thrust
washer that will have settled to a perfect fit on the bottom bush. Tap the dummy
pin down to centralize everything. Carefully remove the dummy and fit the
kingpin and plug and nip up the cotter. Give it a good go with the grease gun as
you move the hub from side to side; this will ensure that the grease gets to the
bottom surface of the pin, as the hole at the bottom of the pin passes the
spiral grooves in the bottom bush.
Grease weekly and clean and inspect often, much more difficult, but never the less just as important, for those of you with Rubies whom I suspect may tend not to be as proactive as those of us with ‘everything on show’. What grease to use? Castrol LM is fine.
Ian Moorcraft
BA7C NEWSLETTER September ‘08