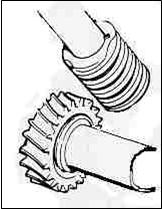
ROTATING THE STEERING BOX WORM WHEEL
Early A7 steering boxes (1923 – 36) have two worm wheels at right angles to each other and, because they spend all their lives rotating through a fairly narrow angle, they get worn in one place. Hence the old A7 problem of having either 2 inches of play at the steering wheel and being able to turn the wheels easily or adjusting out the play but having the steering seize-up towards either end of the lock. Well, there is a solution – the large wheel attached to the steering arm comes off and, since there are three keyways cut into it, it can be turned through 120 degs giving nice new teeth to play with.
REMOVING THE STEERING BOX FROM THE CAR.
On my Box, the floor around the pedals and the steering column is riveted in and so, without cutting larger holes in the floor, the steering column has to go out through the front of the car. So this is a job that is best tackled when you have already removed the engine, as in my case. The first job is to remove the inner tube that is connected to the ignition advance and throttle control levers in the car and the push rods in the engine bay. What it doesn’t say in the books is that the tube is too long to be simply pulled out (after disconnecting the rods at the bottom of the tube) as it hits the roof of the car just behind the sliding roof. So the first job is to undo all the brake and steering bits and pieces (see the Green Guide p. 187) taking care not to miss the small wedge on the inside of the chassis. Undo the two bolts securing the steering box to the chassis and the bracket inside the car so that the column can be lowered and then the offending tube can be pulled up through the column.
DISMANTLING THE
STEERING BOX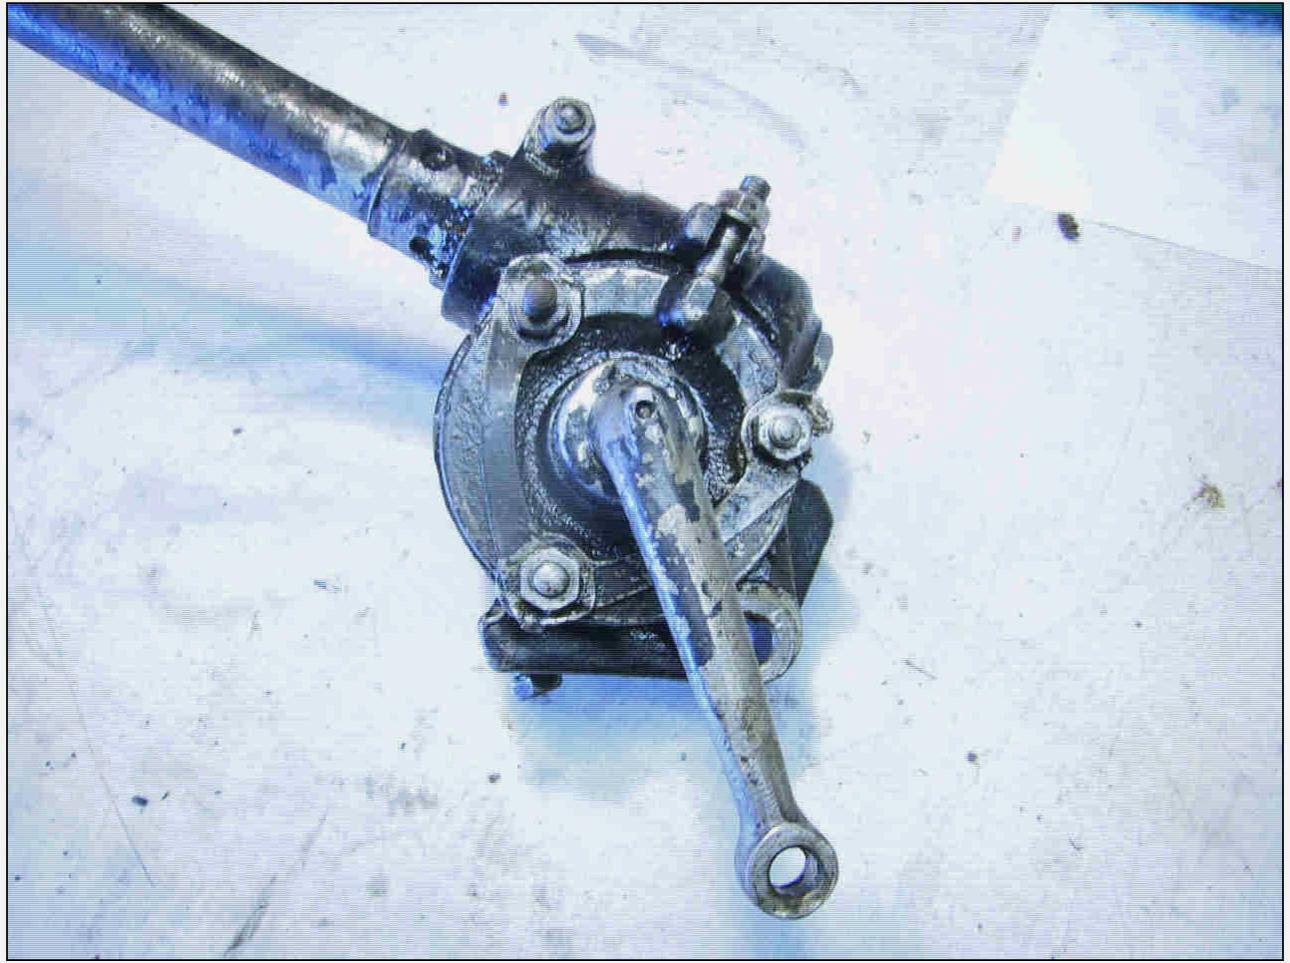
With the column held
firmly in a vice, before anything is slackened, determine if there is any
in-and-out movement of the steering arm. This will be dealt with later, but
there are shims at the end of the shaft which can be easily adjusted to stop any
end-float. Having found if there is any movement or not, proceed to slacken off
the adjusting bolt. Undo the three bolts holding the steering arm to the main
body of the box and pull hard and the whole thing will come out. Now comes the
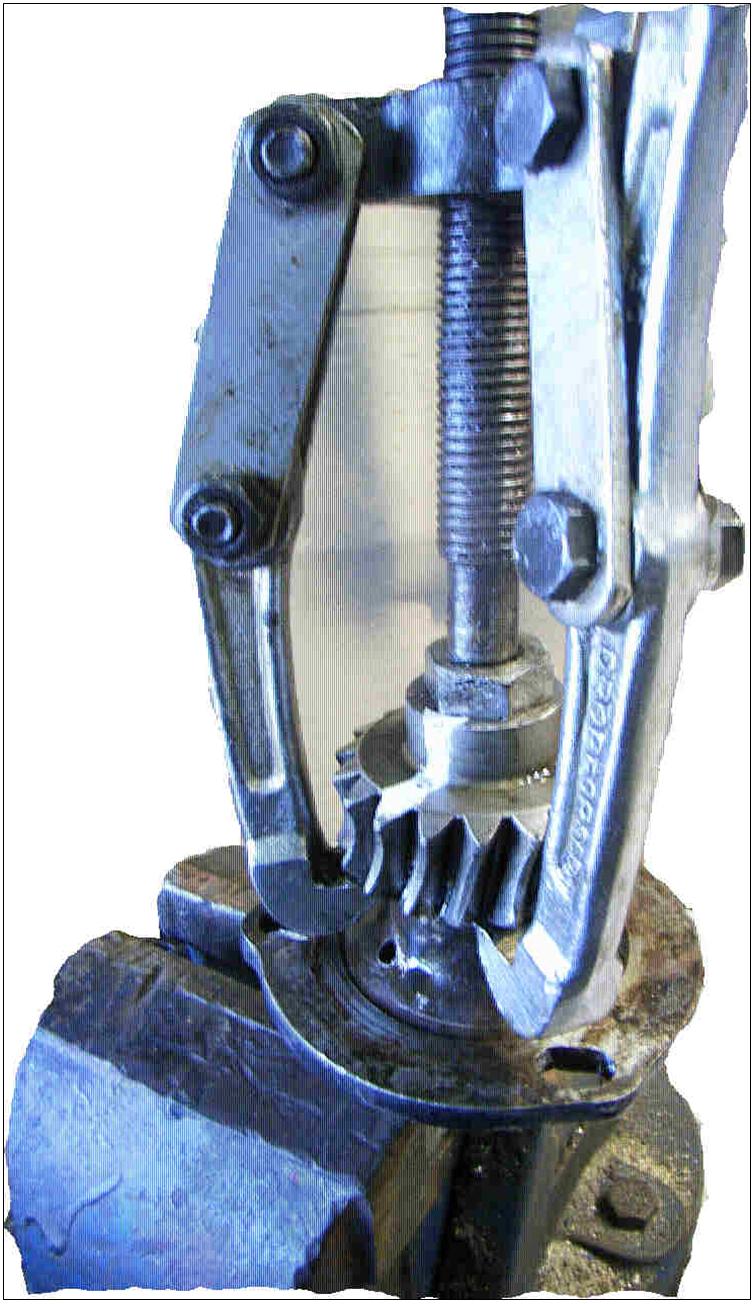
tricky bit – pulling off the worm wheel from its taper. Having undone the
retaining nut and removed the locking washer, be sure to mark both the wheel and
the end of the taper so that you don’t put it back the same way round! I used a
simple hub-puller, refitting the large nut at the end of the taper to stop the
puller from slipping off the end of the shaft. It’s very important during this
operation not to put any pressure at all on the body of the steering box as it
is quite fragile. So, for example, do not use the body to lever off the wheel
with a large screwdriver. When I felt that things were beginning to strain too
much, I gave the top of the puller a bash with a heavy hammer and – bang – everything
leapt into the air and skidded across the bench. Luckily I had marked the
original position of the keyways and the key itself stayed stuck in the taper.
At his stage, I cleaned out all the old grease to see what wear there was but,
to be honest, I couldn’t see where anything was worn away so the wear must be
quite small but with a greatly magnified result. However, having got this far,
there’s no point in not going ahead and, as it turned out, the operation was a
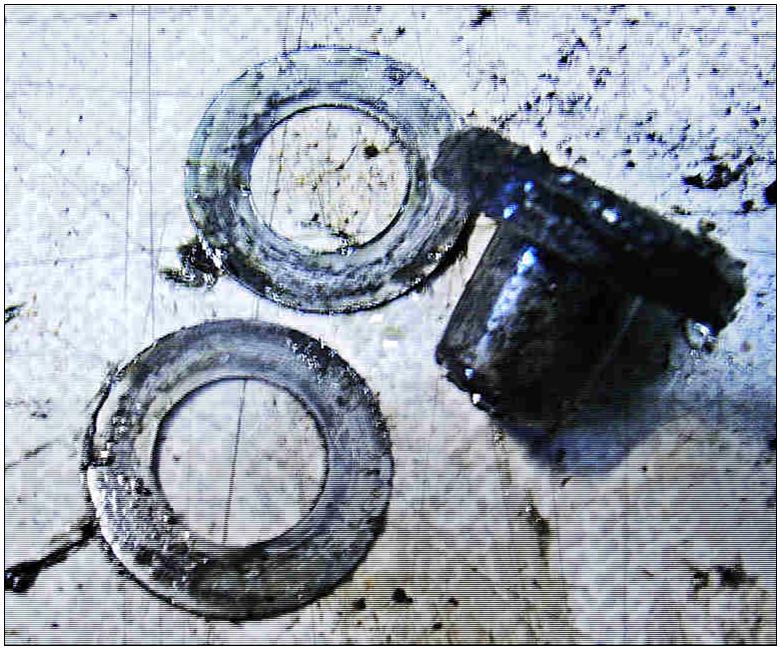
great success. On mine, there was a little end float of the steering arm
in-and-out of the steering box so I needed to thicken-up the shims which are
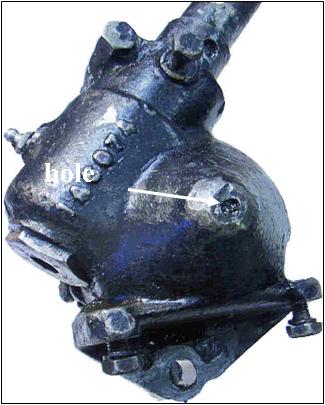
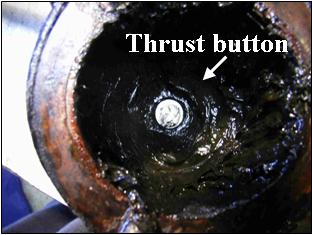
located underneath a button in the bottom of the main steering box. The thrust
button can be easily pushed out through a hole in the back of the steering box
with a bit of stiff wire. (I suppose this hole could be tapped and an adjusting
screw fitted but I’m not sure how often the end-float needs adjustment to make
it worth doing.) Measuring the two shim washers, they were 16 thou” and as I had
a bit of 8 thou shim I cut out a washer using an old set of wad punches
(designed for softer stuff like leather!) and that was, luckily, just the right
amount.
gave the top of the puller a bash with a heavy hammer and – bang – everything
leapt into the air and skidded across the bench. Luckily I had marked the
original position of the keyways and the key itself stayed stuck in the taper.
At his stage, I cleaned out all the old grease to see what wear there was but,
to be honest, I couldn’t see where anything was worn away so the wear must be
quite small but with a greatly magnified result. However, having got this far,
there’s no point in not going ahead and, as it turned out, the operation was a
great success. On mine, there was a little end float of the steering arm
in-and-out of the steering box so I needed to thicken-up the shims which are
located underneath a button in the bottom of the main steering box. The thrust
button can be easily pushed out through a hole in the back of the steering box
with a bit of stiff wire. (I suppose this hole could be tapped and an adjusting
screw fitted but I’m not sure how often the end-float needs adjustment to make
it worth doing.) Measuring the two shim washers, they were 16 thou” and as I had
a bit of 8 thou shim I cut out a washer using an old set of wad punches
(designed for softer stuff like leather!) and that was, luckily, just the right
amount.
REASSEMBLY
Putting it all back
together is a breeze (don’t forget to turn the worm wheel by 120 degs!) but I
wasted a lot of time trying to get the steering arm back in the same position in
relation to the steering wheel, only realising later that the steering wheel has
to come off again and the steering arm turned this way and that to get it all
back into the car. I found that when the steering box was adjusted in the vice
so that it is fairly stiff but not tight, once attached to all the steering gear
and wheels it was just right. And what a difference – a smooth turn from lock to
lock. Total time with the engine out: 2 hours of struggling to get the column
out of the car, 15 minutes to dismantle and turn the wheel 120o, ½ hour fiddling
with the shims, 5 minutes putting it all back again and another hour getting the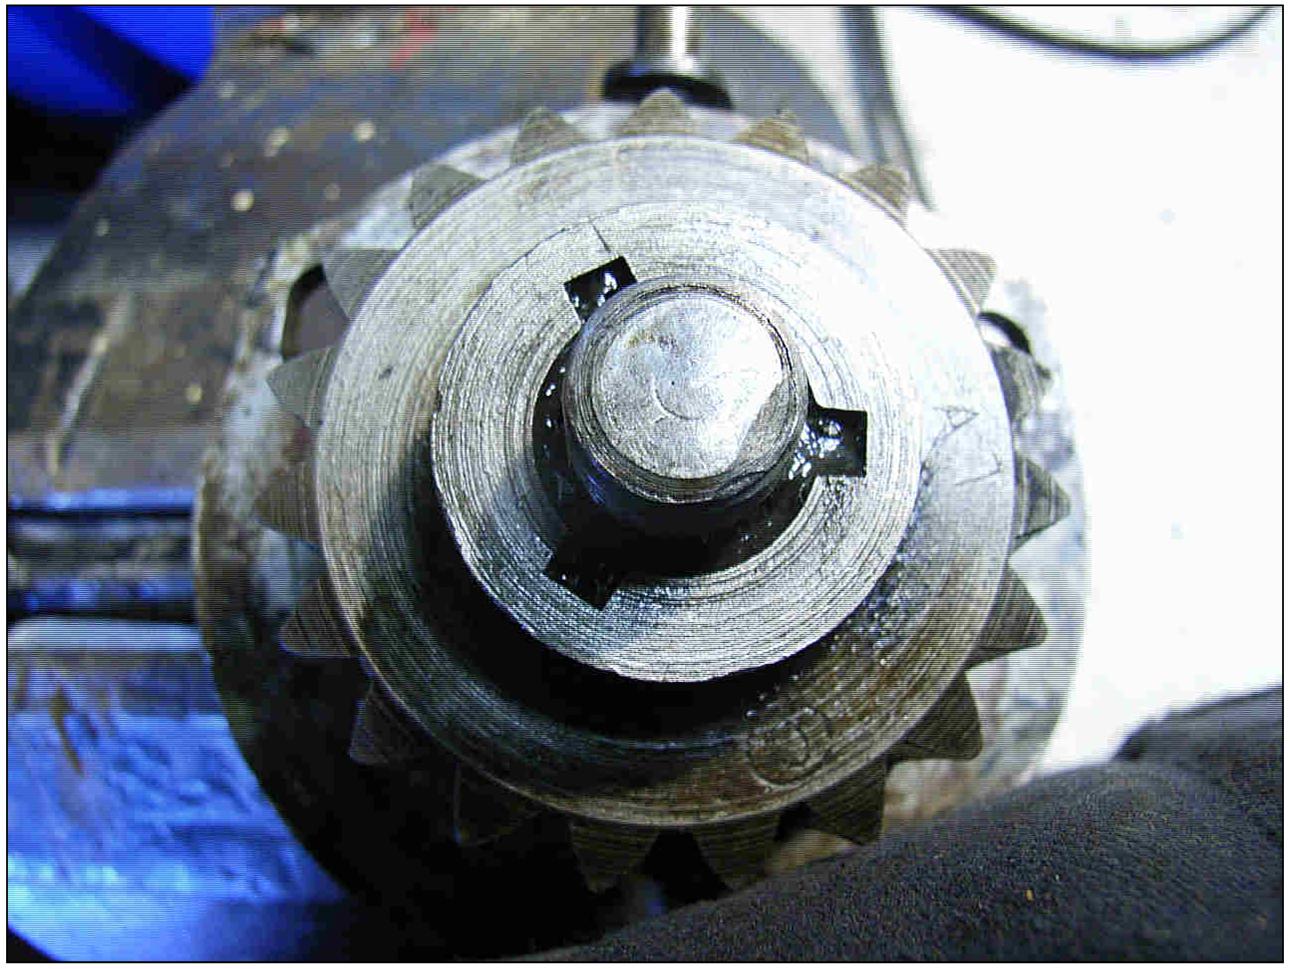 column back into the car and all the brake and steering stuff reassembled.
Total: about 3½ - 4 hours.
column back into the car and all the brake and steering stuff reassembled.
Total: about 3½ - 4 hours.
TECHNICAL NOTES: The details of which nuts to remove and where there are split pins etc is fully explained in Woodrow’s A7 Manual – the only workshop manual we have or the less detailed 750MC ‘Green Bible’. This is a simple fix and the steering box and column aren’t completely dismantled which is another, more complex job. The taper runs in a bush which should be examined for sideways wear and can be easily replaced together with its felt washers. Don’t turn up the lock washers on the three nuts until the end – you may have to make some further running adjustments later.
David Whetton DA7C