Reposition the large spring in the lower body. Position the new diaphragm so that the flat on the rod is in the same plane as the operating arm.
Push the rod, centrally, down through the spring into the pump body. Now for the difficult bit!
Push the operating lever away from the pump body and at the same time grip the diaphragm as before, push down squarely and rotate through 90 degrees. (a quarter turn). Rotation by this amount is most important. There is usually a small tab on the edge of the diaphragm and a similar tab on the lower body which can be used as reference points. If the diaphragm is NOT turned sufficiently the operating rod will not be locked in the correct position and could release itself. NB. The holes for the screws in the diaphragm should now line up with those in the lower body. If not, repeat the process.
Now take the pump housing that was initially put to
one side. Unscrew the hex head bolt which secures the domed pressing
and separate the dome from the housing. Remove and clean the filter. Remove
any accumulated sediment from the chambers in the housing. The valves in the
housing tend to give little trouble so the best advice would be to leave
them alone.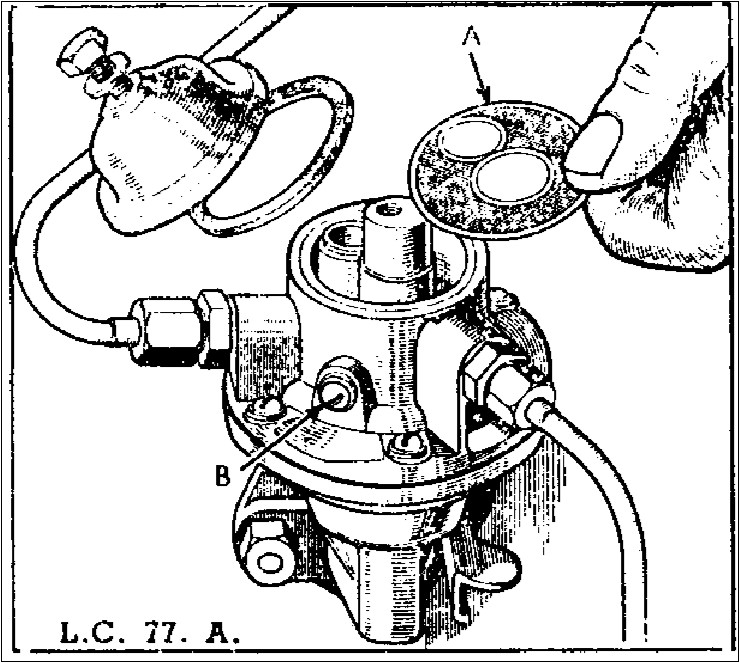
Replace the filter, making sure that it seats properly and, having made sure that the mating surfaces between the dome and the body are clean, replace the dome and tighten down. Only tighten sufficiently to effect a good seal; overtightening is likely to distort the dome and/or strip the thread.
Now position the top and bottom halves of the pump together, making sure the outlets are in the correct position and insert the six screws. Do NOT tighten them yet. Pull the pump operating arm towards the pump fully and whilst holding it in this position tighten the six screws fully. If you now operate the pump lever you should hear a croaking noise. Well done!
All that now remains is to refit the pump to the engine. It is important that the lever is positioned on the correct side of the camshaft, i.e. between the camshaft and the side of the crankcase. This is easier to do than describe. Tilt the pump away from the engine and carefully insert the end of the lever into the top of the hole in the crankcase. Feed the lever into the engine in an upward direction. (What you are effectively doing is sliding the tip of the lever up inside the crankcase.) As you feed it up you must also rotate the pump so that it locates on its fixing studs. Some resistance may be felt as you do this since the lever should now be pressing on the camshaft.
Replace the washers and nuts and tighten evenly but not excessively and reconnect the fuel pipes. It is also advisable to fit a new gasket when refitting the pump.