THE PNEUMATIC WINDSCREEN
WIPER
(The following article was first
published in the Magazine of The Vintage Austin Register and our thanks go to
its Editor, and of course the author Jim Stringer)
Additional dismantling notes by
Douglas Alderson, DA7C at the bottom of the page
The automatic windscreen wiper was first introduced onto
Austin Motor vehicles in the October of 1924. The device was manufactured by
Joseph Lucas of Birmingham and was operated by the vacuum created via the inlet
stroke of the engine carried through a length of small bore tube connected to
the inlet manifold.
The device is operated by first unscrewing the suction control screw, this
allows the air which is in one of the cylinders to be withdrawn, the resultant
suction moves the rack which operates the wiper arm via the sector wheel or
pinion. When the rack reaches the end of its travel a slide valve is tripped and
the air is sucked from the opposite cylinder and the rack returns. The space
between the two leather washers is always maintained at atmospheric pressure
(otherwise the thing wouldn't move!)
A small lever is provided to allow the device to be operated by hand whenever
there is insufficient vacuum to operate it mechanically.
Although the device worked quite well, it did have a couple of drawbacks. One,
the dropping of the wiper arm directly in front of the driver’s line of vision
when it was switched off. This was subsequently rectified in 1930 when a special
valve mechanism, operated by a small slide situated behind the adjusting screw,
was introduced.
The other draw back concerned the inability of the motor to operate at ful l
efficiency when the engine was being accelerated and the amount of vacuum was
significantly reduced - perhaps this may have been viewed as a good deterrent
against driving too fast in the rain!
l
efficiency when the engine was being accelerated and the amount of vacuum was
significantly reduced - perhaps this may have been viewed as a good deterrent
against driving too fast in the rain!
The vacuum wiper therefore only enjoyed a relatively short period of popularity
until it was superseded by electrically operated ones. Ford, however, persevered
and were using pneumatic wipers into the fifties, but by then had installed a
small air reservoir to overcome the problems.
It is of course a requirement for the MOT that, if fitted, the wiper motor must
work. If it doesn't, take it off if you have a car with a split screen which
will give you adequate forward vision. For later cars, such as the Box or
Ruby models, this won't apply.
Generally speaking, there is very little to go wrong
with a vacuum wiper and they
 seldom give trouble. A small hole is provided (in
the most inaccessible position) on the top of the unit for the occasional few
drops of oil. How often, I wonder, does this hole ever get used?
seldom give trouble. A small hole is provided (in
the most inaccessible position) on the top of the unit for the occasional few
drops of oil. How often, I wonder, does this hole ever get used?
If your wiper does ever fail, it is a simple matter to remove it and strip it
down to its component parts to affect a repair.
 To
remove the unit, first take off the wiper blade which is secured by a
collet-type hexagonal screw. Once removed, two smaller screws will be revealed
which actually hold the unit onto the screen. Finally, remove the rubber tube
which is connected to a pipe at the top of the unit. Once stripped, clean all
the bits carefully in clean paraffin using a cheap artists paint brush. If your
unit has not received any attention for several years, the chances are that the
washers will be dry and hard, making them pretty useless (Obviously they need to
be soft and supple to create the best seal possible within the wiper body).
However, if the washers still appear to be 'sound' they can be revived by an
overnight soaking in linseed oil, which can be gently eased into the surface
until totally saturated. Originally this was achieved by a substance called
Russian Tallow which of course you could still use, if you could find any!
To
remove the unit, first take off the wiper blade which is secured by a
collet-type hexagonal screw. Once removed, two smaller screws will be revealed
which actually hold the unit onto the screen. Finally, remove the rubber tube
which is connected to a pipe at the top of the unit. Once stripped, clean all
the bits carefully in clean paraffin using a cheap artists paint brush. If your
unit has not received any attention for several years, the chances are that the
washers will be dry and hard, making them pretty useless (Obviously they need to
be soft and supple to create the best seal possible within the wiper body).
However, if the washers still appear to be 'sound' they can be revived by an
overnight soaking in linseed oil, which can be gently eased into the surface
until totally saturated. Originally this was achieved by a substance called
Russian Tallow which of course you could still use, if you could find any!
If the 13/8 inch washers are beyond redemption you may be able to obtain
replacements from a hardware shop. If you have to fit new washers carefully
remove the rivets holding them and then carefully rivet the new ones in their
place. If riveting causes a problem, you could use small nuts and bolts, but
remember that any small protrusions will interfere with the smooth operation of
the unit. Thoroughly inspect all components for wear and tear. Other than the
washers, the only bar to the unit behaving satisfactorily will probably be
accumulated dirt and congealed grease, or more likely, a perished rubber hose to
the inlet manifold (which can be supplied by John Barlow and The Seven Workshop
amongst others)
Check that the slide valve operates smoothly and that the pipe connections are
free from any blockages. Check that the teeth on the 'pinion' mesh smoothly with
the slots on the 'rack' and that the shaft onto which the arm is located is not
bent.
When you are satisfied that all are in good working order, grease the two halves
of the barrel with a thin smear of Vaseline and check that the 'rack' with the
washers attached runs through them smoothly but with a slight resistance.
Reassembly is the reverse of the stripping down
procedure - so it will pay you to make a note of how you took it apart! Refit
the motor to the screen and reconnect to the tubing from the manifold, and - Hey
Presto!
Strip down of motor.
Remove the adjusting screw and cover to reveal 2
screws holding the cover.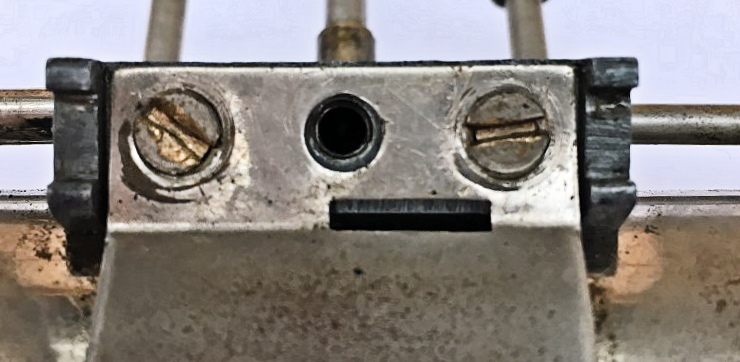
Unclip the cover then unclip the
cover around the lever.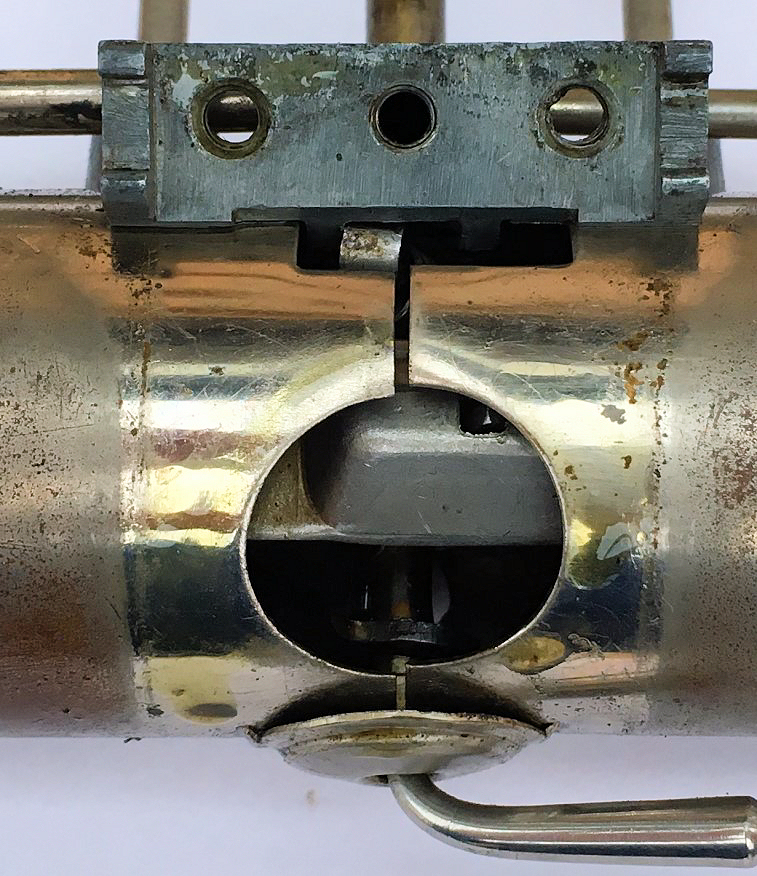
Slide off the body of the wiper to
reveal the leather washer and the rivet holding it in place.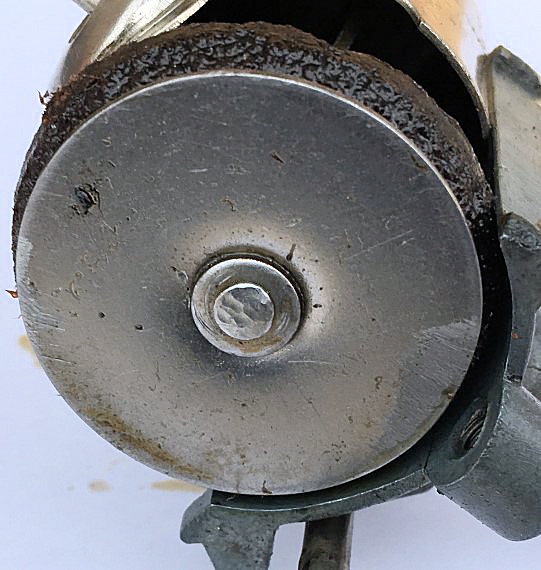
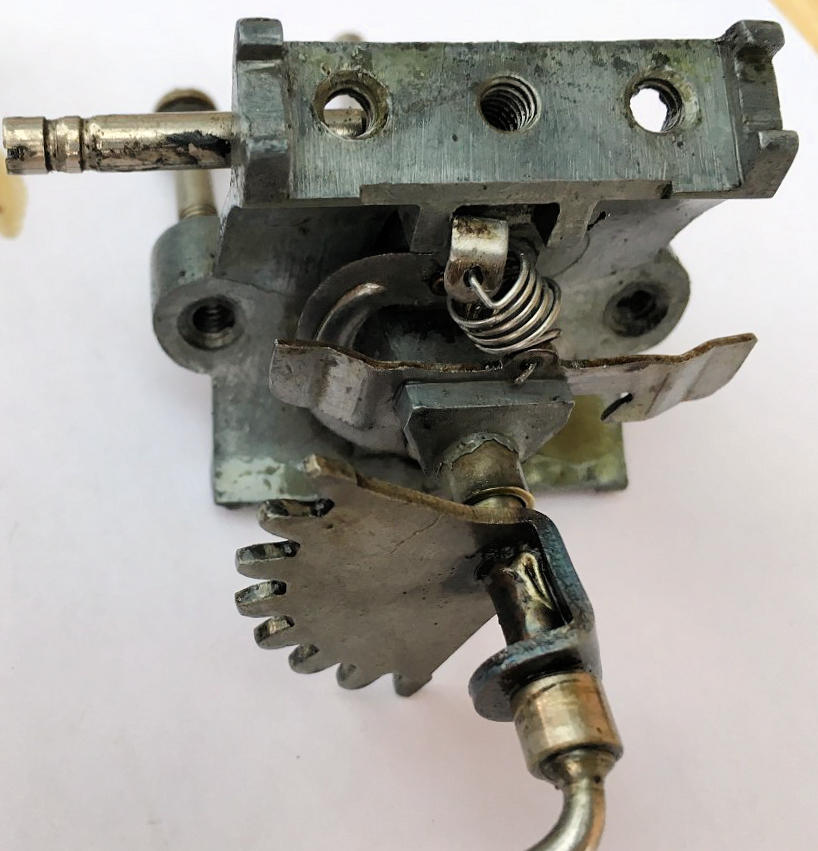
 Slide
off the other half of the body, at this stage the rack will probably fall off.
But before it does, make a mental note which way it goes. In the photo,
right, the lever/pinion has rotated 180 degrees, for the rack to fit on the
pinion
Slide
off the other half of the body, at this stage the rack will probably fall off.
But before it does, make a mental note which way it goes. In the photo,
right, the lever/pinion has rotated 180 degrees, for the rack to fit on the
pinion
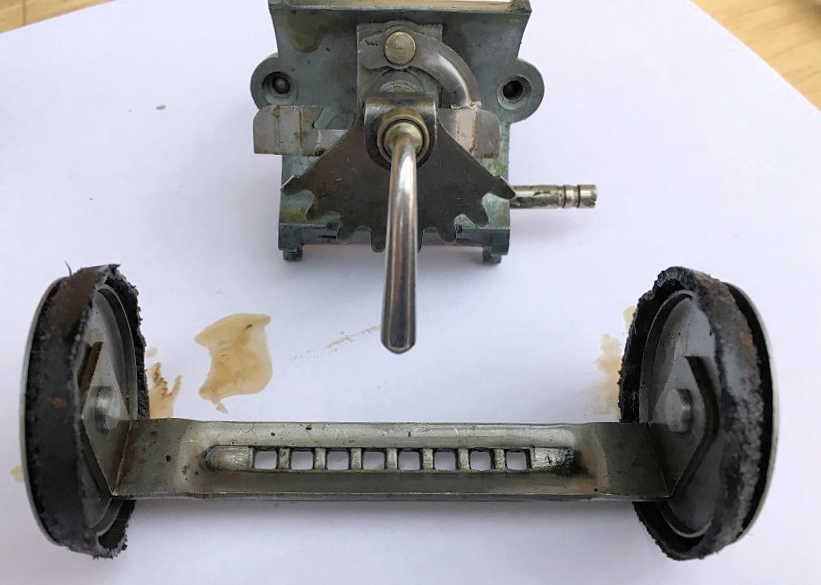
 The
shaft for the wiper arm can be withdrawn from the mechanism, but be careful as
the shaft may be bent and get stuck. The main mechanical part is very easily
damaged or threads damaged so take care not to force anything.
The
shaft for the wiper arm can be withdrawn from the mechanism, but be careful as
the shaft may be bent and get stuck. The main mechanical part is very easily
damaged or threads damaged so take care not to force anything.
The assembly procedure is the reverse but from experience it is a bit of a
fiddle to get the rack and pinion meshing correctly and fit the two halves of
the body. The trick I have found is to fit one body then check the rack/pinon
and then fit the other body.
Douglas Alderson DA7C