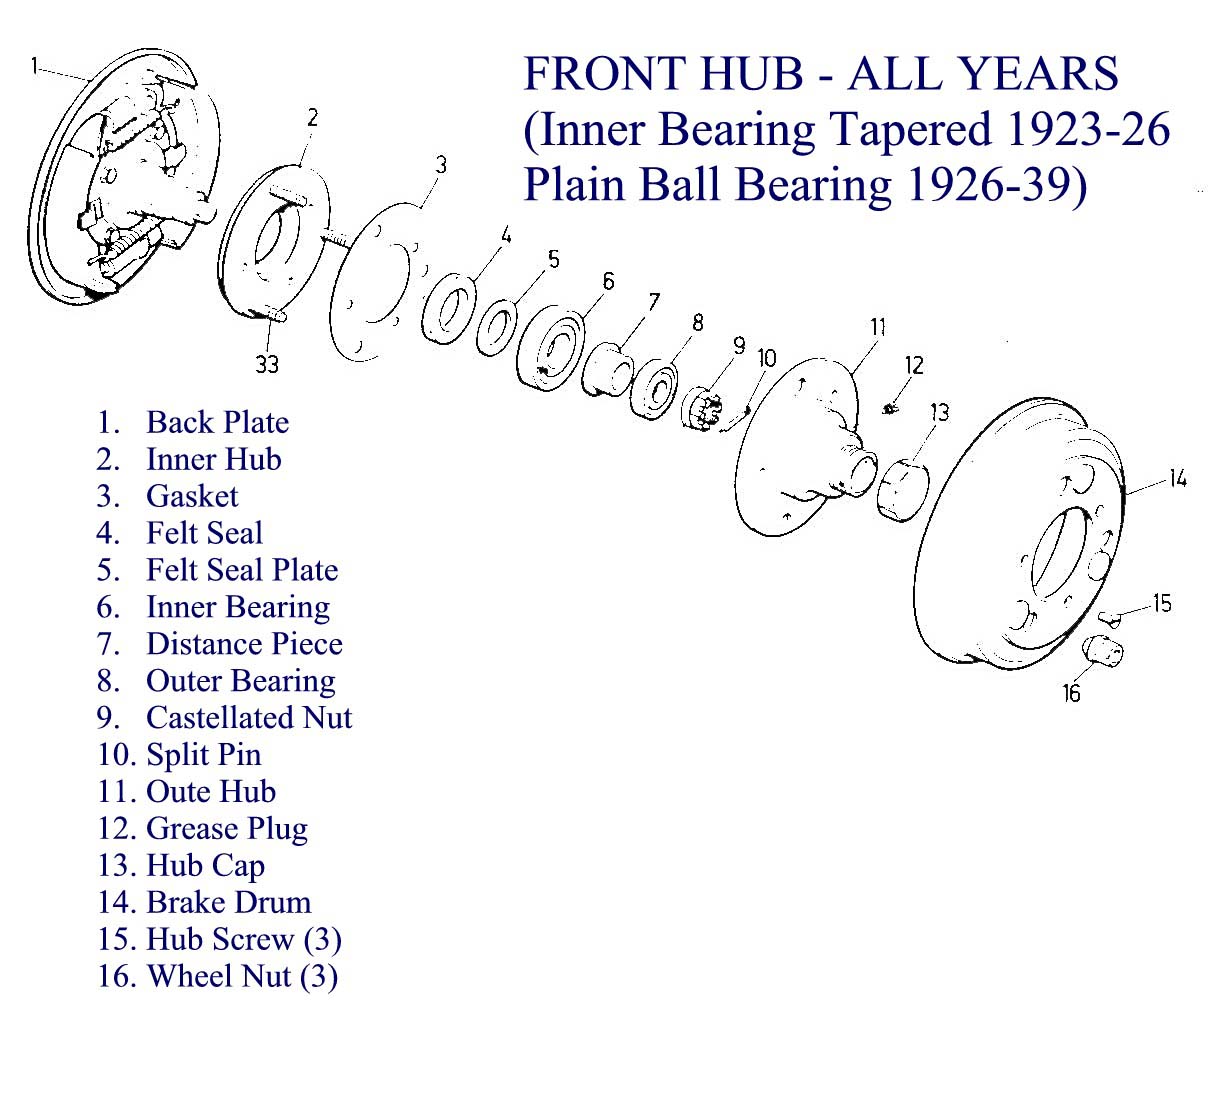
The front wheel hubs were unchanged throughout the Seven’s lifespan except for the earliest cars (1923-26) whose inner bearings were tapered rather than parallel and the following notes apply to all Sevens after 1926.
The first thing to note is that the front hubs cannot be tightened. If there is play at the rim of the wheel which is not due to the more common fault of worn king pins, it cannot be taken up by tightening the castellated nut in the centre of the front hub. Any movement which is due to worn king pins can easily be seen between the swivel eye at the back of the wheel hub and the axle eye at the end of the front axle when the wheel is rocked back and forth. The only solution with worn bearings is to replace both bearings in each hub. Bearings (LJ 1¼” and LJ ¾”) are available from Willy McKenzie or from bearing suppliers such as Ashley Power.
DISMANTLING:
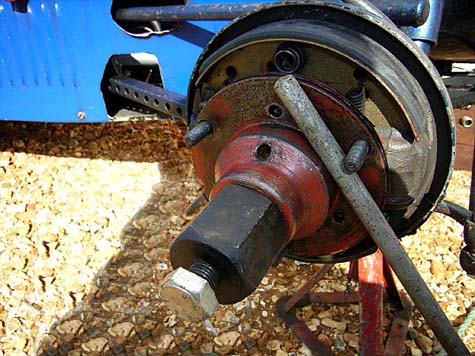
1. Remove the wheel, the three countersunk screws and the brake drum
2. Remove the grease plug and unscrew the hexagonal grease hub cap.
3. Decide at this point if you have a suitably thin ½ inch Whit socket or box spanner that will reach inside the hub and unscrew the castellated nut. If you do have a suitable tool, and you can remove the split pin through the holes provided in the hub, unscrew the castellated nut at this point. If you do not have a suitable tool, then move to next step. In either case, mark the position of the hole for the split pin at the end of the axle with a punch.
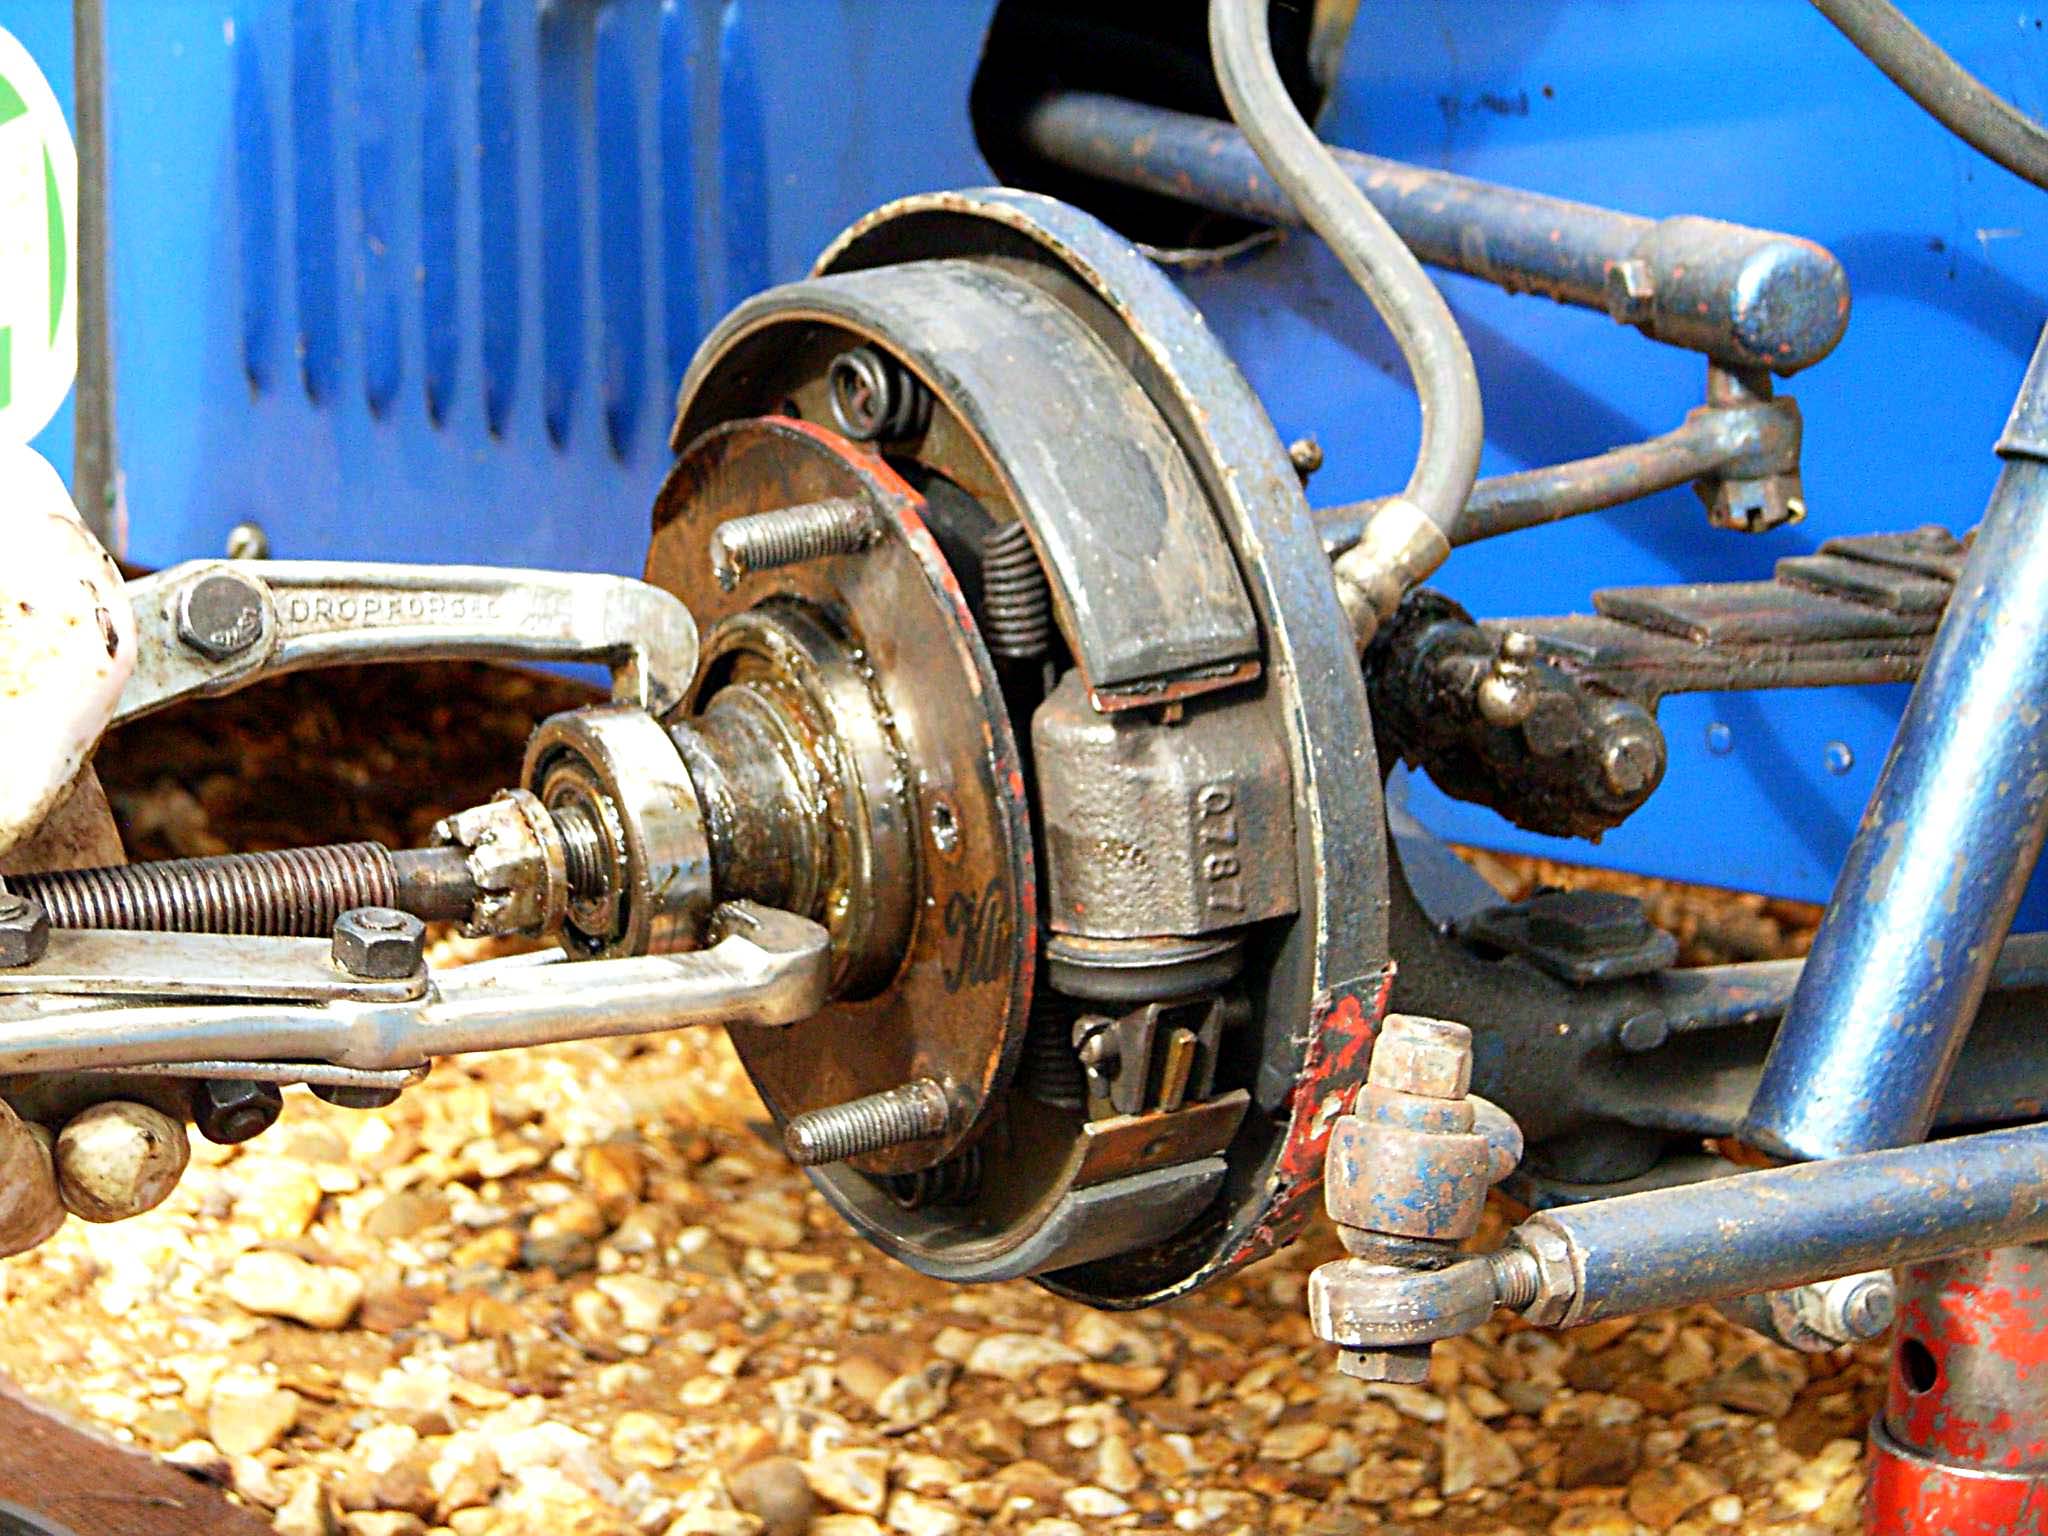
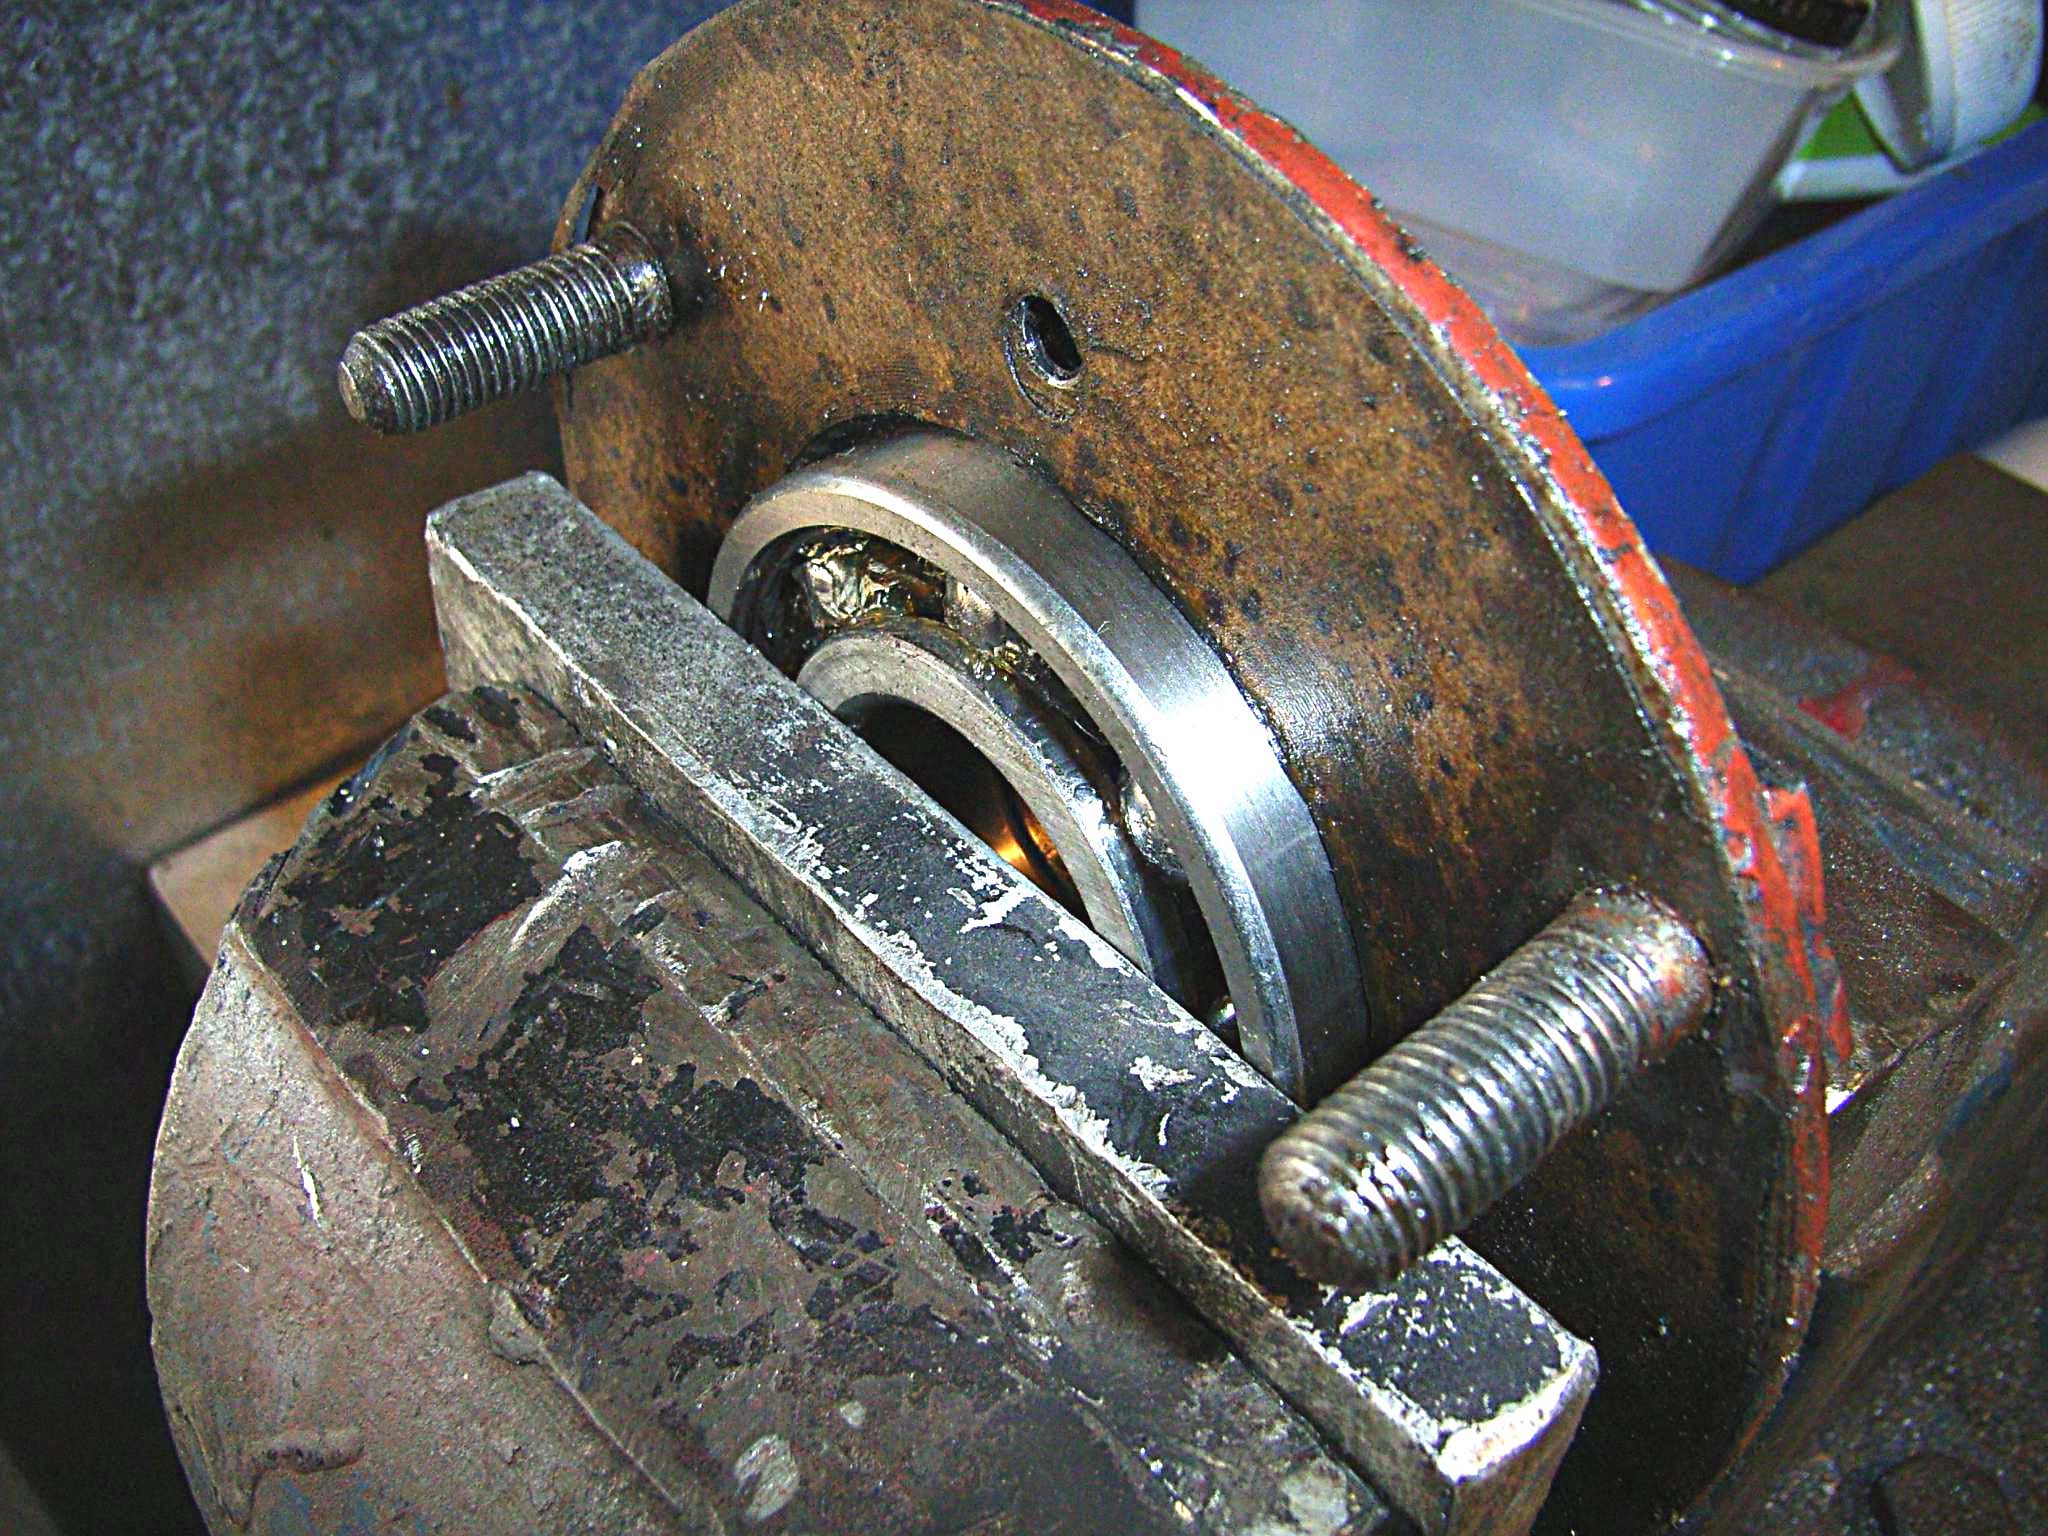
4. Use a proper A7 hub puller (available from Willy McKenzie) and remove the outer hub.
5. One of two things will have happened – if you were not able to remove the castellated nut then the outer bearing will have remained on the axle. The bearing may also have remained on the axle even if you were able to remove the nut, but it may have come away in the outer hub.
6. So you will either have to pull the outer bearing off the axle (after removing the castellated nut if necessary) or drift it out of the hub using a suitably large socket.
7. Once the outer bearing has been removed, re-fit the castellated nut a few turns to make a hollow for the hub extractor, back-off the centre nut of the hub extractor and re-fit the outer hub complete with the extractor. Run on the wheel nuts as far as they will go without force and, by tightening the hub extractor, remove the inner hub together with the outer. They can now be easily separated.
8. Drift out the inner bearing from the inner hub using a suitably large socket or drift.
REPLACING:
9.
 INNER
HUB: Ensure the felt seal is undamaged or replace it. If it hasn’t been
treated with tallow (feels hard, wax-like), oil the centre of the felt to avoid
it friction burning on the axle. Replace the metal felt seal washer the correct
way round (raised portion outwards towards the felt). Press-in the inner
bearing preferably in a vice rather than by hitting it.
INNER
HUB: Ensure the felt seal is undamaged or replace it. If it hasn’t been
treated with tallow (feels hard, wax-like), oil the centre of the felt to avoid
it friction burning on the axle. Replace the metal felt seal washer the correct
way round (raised portion outwards towards the felt). Press-in the inner
bearing preferably in a vice rather than by hitting it.
10. Check the hub gasket and replace if necessary. Smear lightly with oil or grease.
11. OUTER HUB: The next step depends whether or not you have a suitable tool to tighten-up the castellated nut: If you do have a suitable tool then press the outer bearing into the outer hub.
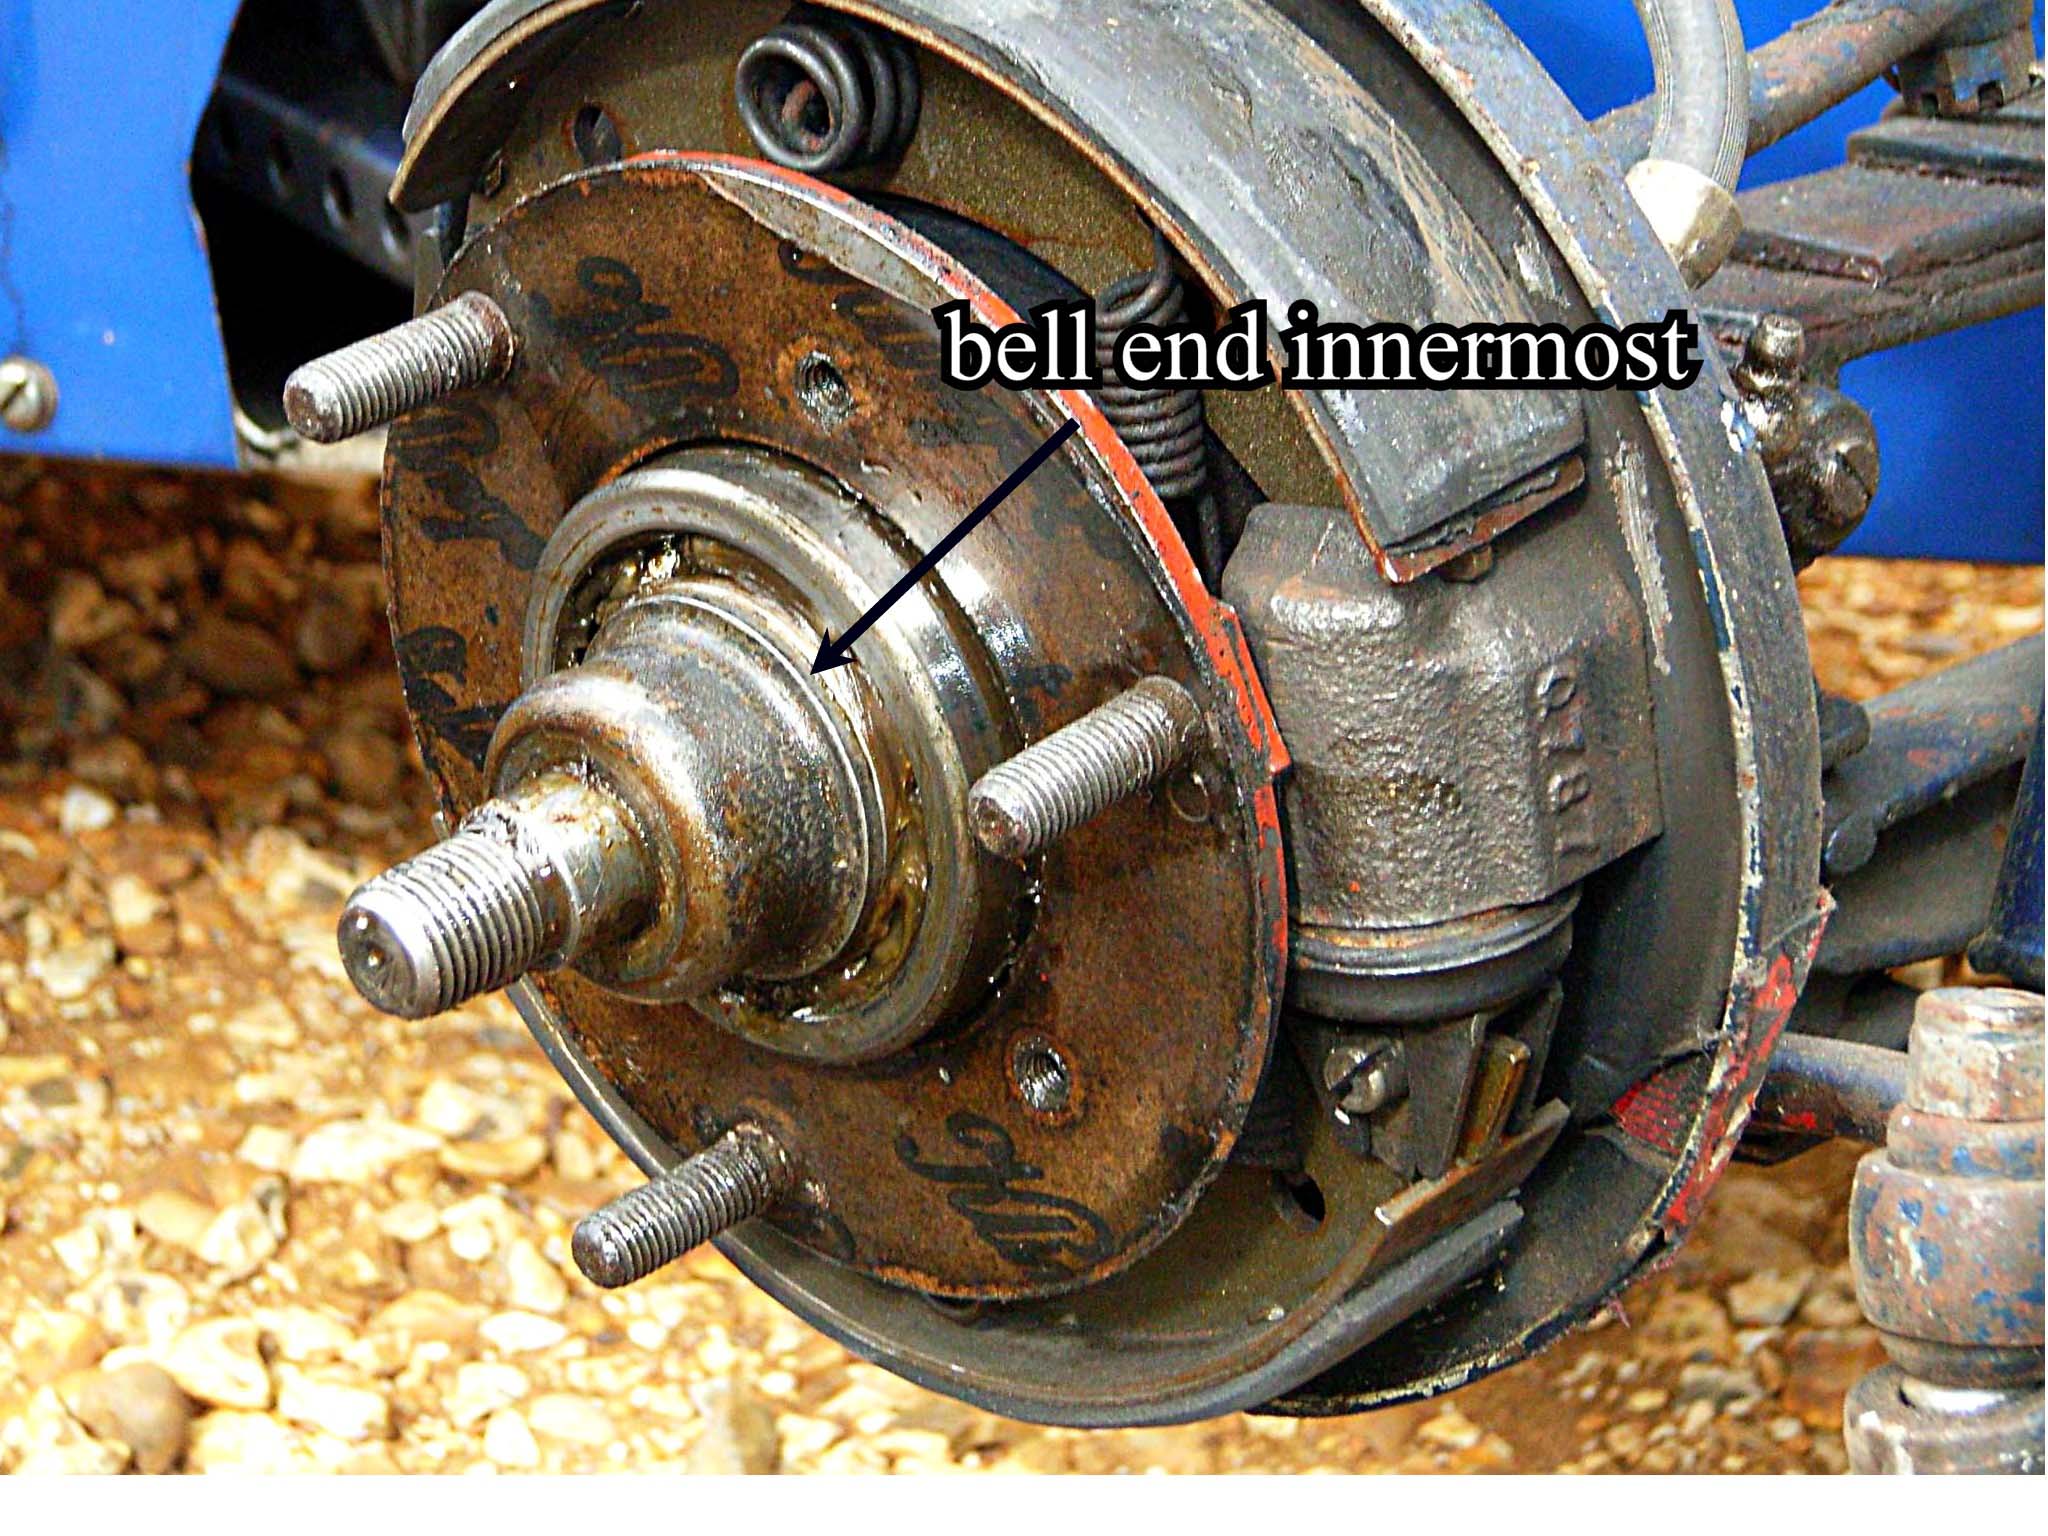
12. If you do not have a suitable tool, you will need to drift the outer bearing
onto the axle having first drifted the inner hub roughly into place and then
fitted the distance piece the right way round (with the bell-end inwards) and
tightened-up the castellated nut until the inner hub is tight against the inner
end of the axle. Use a new split pin but there is no need to bend it over as
the axle doesn’t move. Drift on the outer hub, pulling it in the last few
centimetres, if necessary, by the wheel nuts. Grease the bearings but don’t
fill the void with grease or it will eventually get onto the brake linings.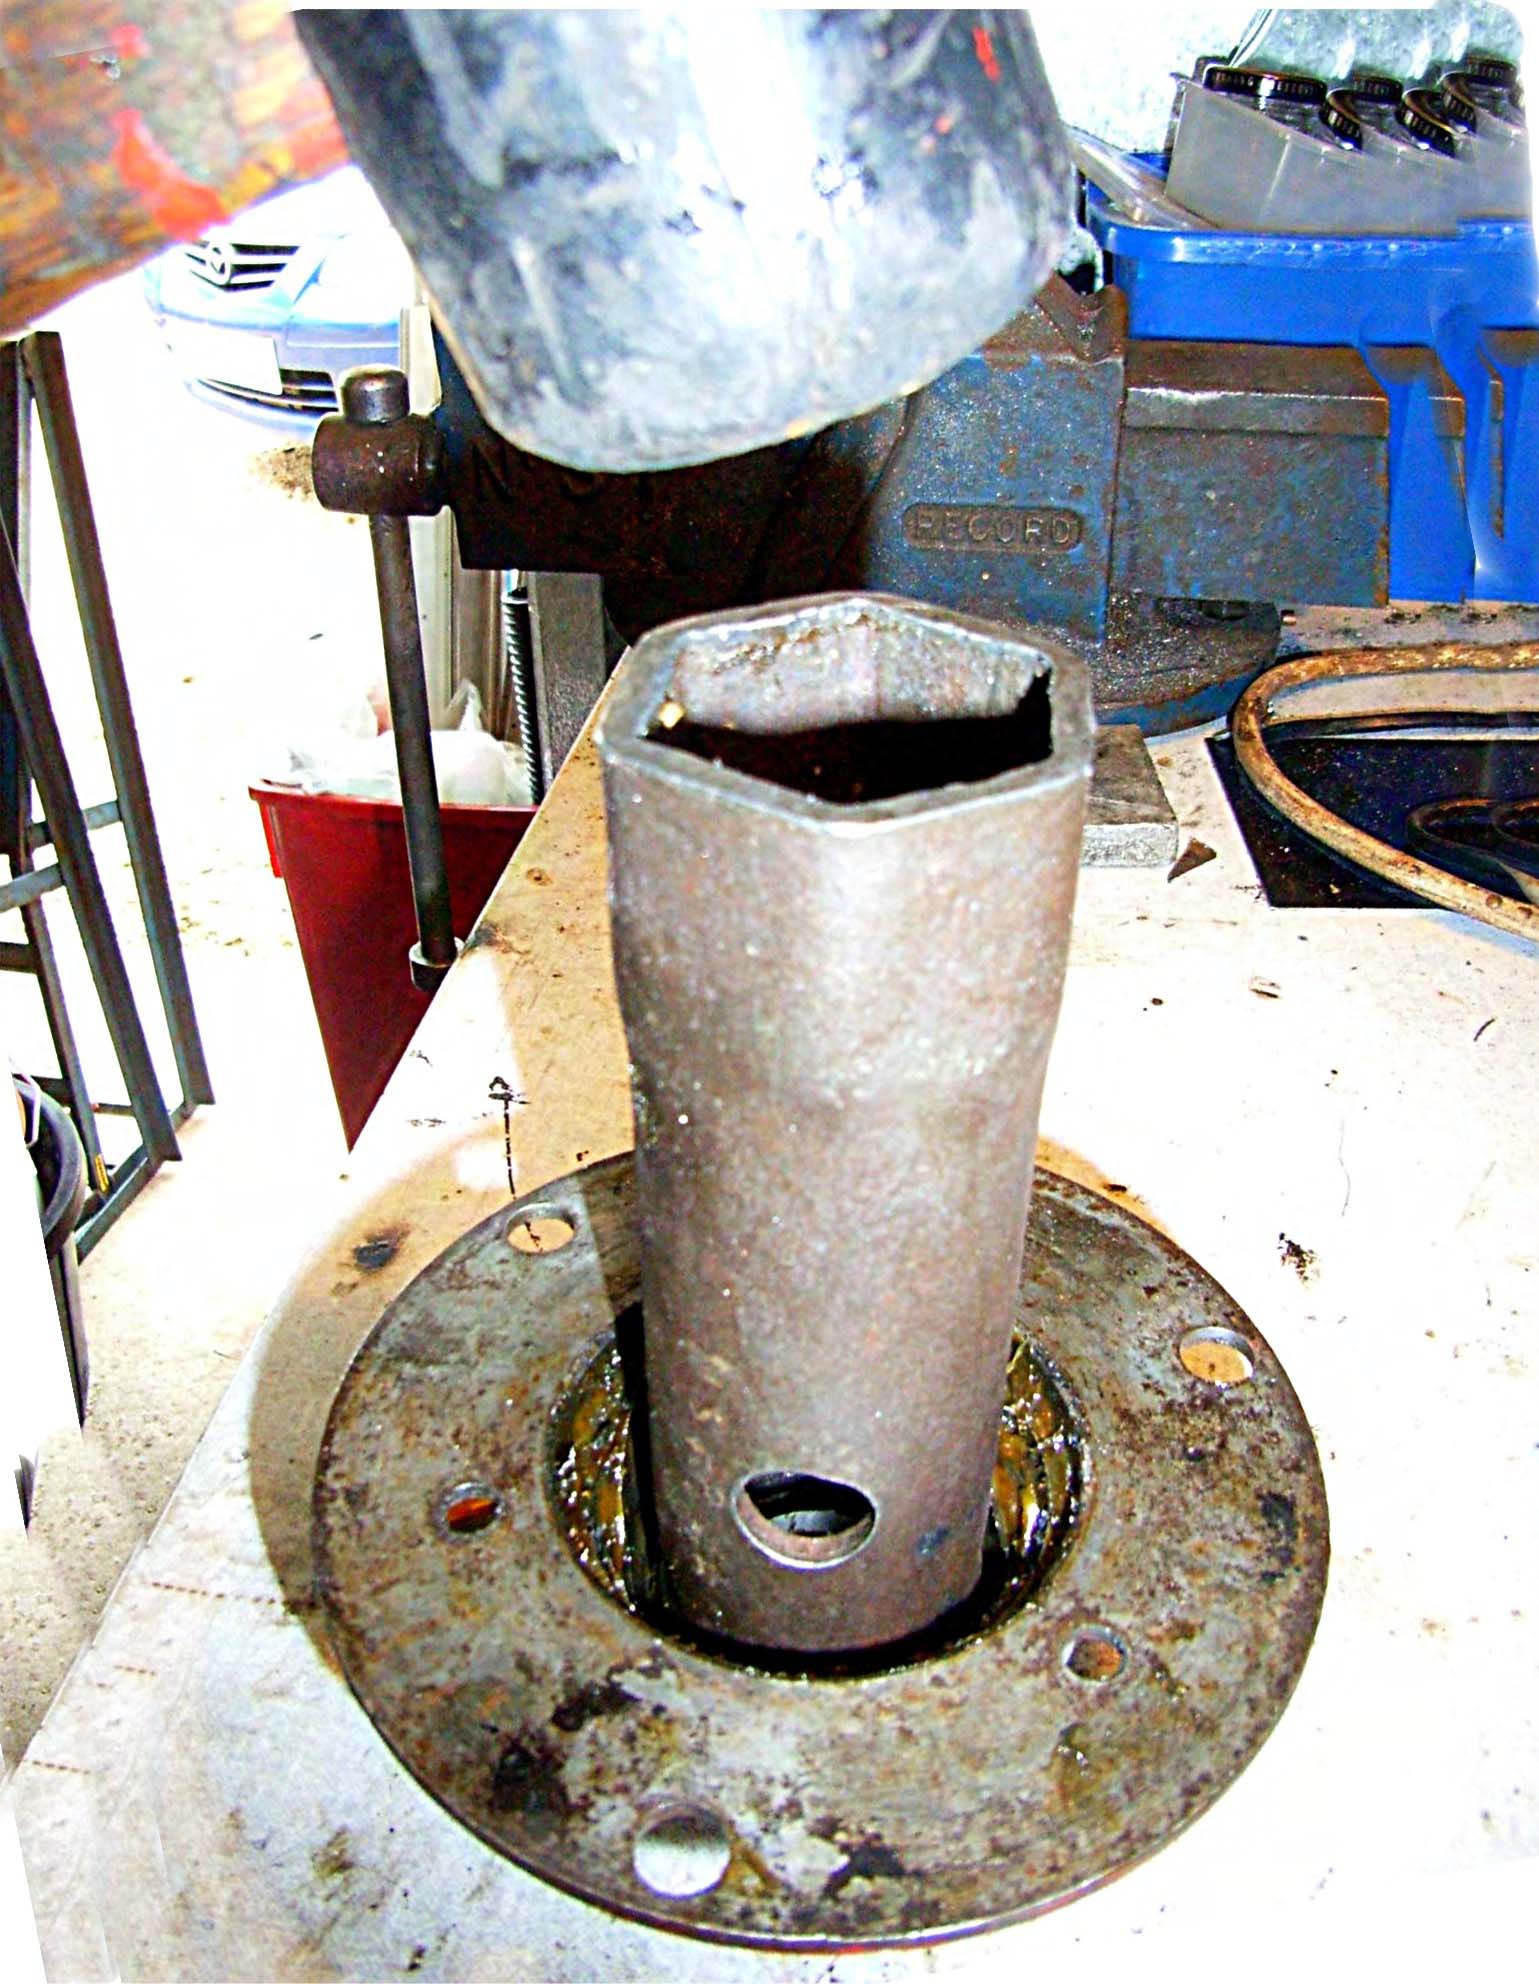
13. If you do have a suitable tool then the whole hub can be assembled, using wheel nuts to keep it together, not forgetting the distance piece between the two bearings, and drifted onto the axle. There will be some resistance as the outer hub engages with the inner bearing and it may need pressing in with a vice. The whole hub is then finally tightened-up by the castellated nut until the inner hub is tight against the inner end of the axle. Use a new split pin through the holes in the hub - there is no need to bend it over as the axle doesn’t move. Using a grease nipple in the hole in the outer hub, apply about 15 strokes of a grease gun and replace the grease plug.
14. Replace the brake drum without the countersunk screws, the wheel and its nuts. This is to ensure the hub is pushed fully home on the axle. When you are happy that the hub is fully home, remove the wheel, fit the 3 countersunk screws through the brake drum, refit the wheel, not forgetting to give the wheel nuts a final tightening on the ground.
David Whetton