1. Reflectors. Decide that, if you’re going to fit new LEDs, you might as well fit new reflectors. These come from Seven Workshop (01692407507). There are two types – those with the side pilot light (pre-Ruby Boxes 1929/34 – part no. AE 0804A) and those without (Ruby-types 1935 – 1939 with separate side lights – part no. AE 0804). Both come with filament bulbs and holders.
2. At this point, you may wish just to stick with the brand new reflectors and bulbs, but I had decided to fit LED bulbs.
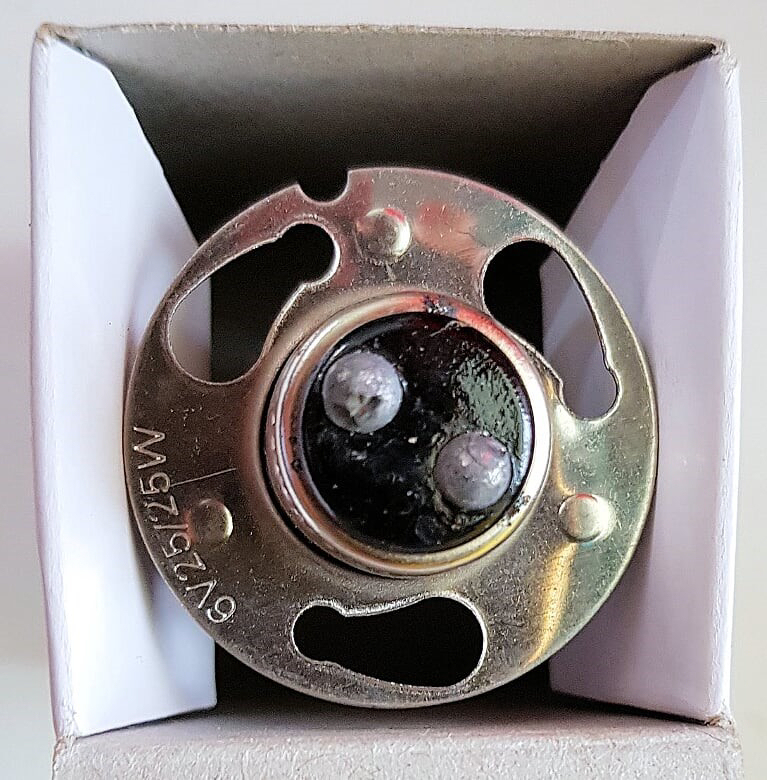
3. Holders. The reflectors come with new APF (American Pre-focus Fitting) holders (see photo) as do the filament bulbs provided. So, order the reflectors first then ring the LED supplier to get the right fitting. If you’re not changing your reflectors, then you do need to tell the LED supplier which A7 bulb holder you’ve got. There are good descriptions on their website, but I found a phone call to be very quick, efficient and helpful.
4. Buying the LED bulbs. Go to Classic Dynamo and Regulator Conversions website at http://www.dynamoregulatorconversions.com/led-headlamp-bulbs-shop.php but easiest by far is to ring them on 01522 703422. Start with the voltage (6 or 12v), positive or negative earth, holder type and then ‘dipping headlamp’.
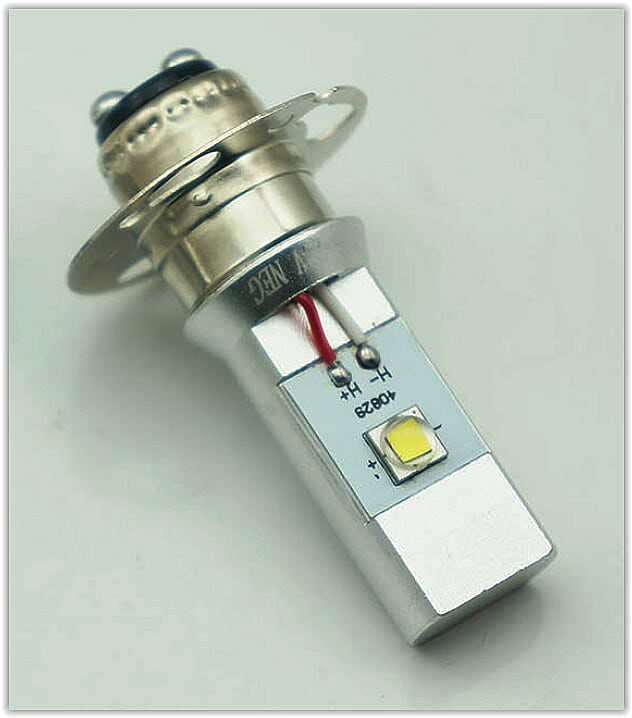
5. Fitting the LED bulbs. The LEDs are dippable so read the instructions carefully to see which way you must fit the bulbs in the holders. The LED ‘bulb’, in fact, comprises two tiny LEDs, one for ‘dip’ and one for the ‘main’ beam (although both come on together for ‘main’). On mine, you fit them with the LED of the two nearest the front of the bulb, uppermost. Unlike quartz halogen bulbs, you can touch the bulbs directly. (See photo).
6. Wiring. The new reflectors didn’t come with wiring details, so I had to experiment with the new, coloured wires:
· Pilot light: green and brown/white. Either one to earth or live, it doesn’t matter
· Main bulb: black = earth; red/white = main beam; red/black = dip beam
Members who have had difficulty getting the LEDs to work properly have found it is essential to have a good, separate earth up to each bulb.
7. Cost. The new reflectors from 7 Workshop cost £67.20 (pilot) or £58.80 (no pilot) for a pair plus £6 postage. My pair of APF dipping LEDs from Classic Dynamo and Regulator Conversions cost £62 incl. postage.
8. Charging Rate. The LED bulbs use very little power. So I adjusted my third brush (clockwise) to reduce the charge rate down to about 2 amps when all lights are on at full revs. This then gives the maximum charge needed across the whole range but there is no need, of course, to reduce the charge rate if you don’t want to. There is an article on the club website on reducing the dynamo output when no lights are on if you want to take this further, but I have been operating the dynamo on full 8 amps for years without any ill-effects on either myself or the battery.
9. Adjusting the beams. With the increased brightness of the LED headlights, it is essential that the beams are directed down more than before with filament bulbs to save dazzling on-coming traffic. The light is not as focussed as with ‘normal’ bulbs and has more scatter. However, with the increased output, bending the beams down more isn’t a problem. One bonus, coming home along our dark lanes, is that the dip beam remains on as well as the full beam so the edges of the road are picked-out beautifully.
 out
the bulbs to check on the holder type, especially whether they have parallel or
off-set pins, and their diameter (normally 15 mm). I was very surprised to
find that my ‘cotton reel’ stop/tail bulbs had parallel pins and it depends
which way round one fits them to get the correct light to operate. (See photo)
out
the bulbs to check on the holder type, especially whether they have parallel or
off-set pins, and their diameter (normally 15 mm). I was very surprised to
find that my ‘cotton reel’ stop/tail bulbs had parallel pins and it depends
which way round one fits them to get the correct light to operate. (See photo)