Usually there is a BSF screw below t
 he
distributor base plate which needs to be unscrewed as it stops the unit being
re-moved, often too close to the scuttle to get a screw driver on, so may need
grips. Above this is the metal pointer on the base plate. Mark this and mark the
distributor body directly above it with a dab of paint or Tippex correction
fluid so that the marks can be accurately aligned back. Remove the cap and
rotate the engine by hand until you have the rotor arm into such a position that
you can ensure it is in the same place by eye when replacing the distributor, as
you can easily be a tooth out when replacing the unit.
he
distributor base plate which needs to be unscrewed as it stops the unit being
re-moved, often too close to the scuttle to get a screw driver on, so may need
grips. Above this is the metal pointer on the base plate. Mark this and mark the
distributor body directly above it with a dab of paint or Tippex correction
fluid so that the marks can be accurately aligned back. Remove the cap and
rotate the engine by hand until you have the rotor arm into such a position that
you can ensure it is in the same place by eye when replacing the distributor, as
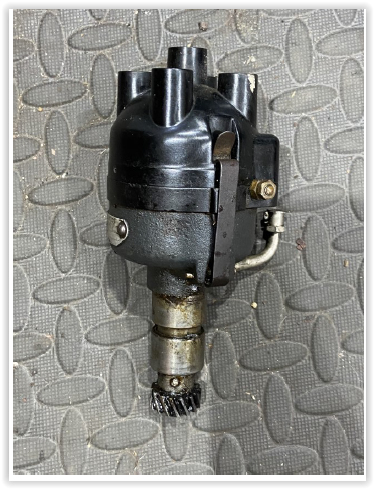
you can easily be a tooth out when replacing the unit.Slacken the base plate to distributor clamp's 3/16” nut and screwdriver slot until it's quite slack (or remove base plate completely) and withdraw the distributor without turning the rotor. Inspect the gear condition and have your grease close to hand to smear the gear. Do not over grease it or you will run the risk of contaminating the commutator of the dynamo.
Replace the distributor noting the rotor arm position and your marks. Tighten the clamp and remember to replace the screw mentioned at the start. With a bit of luck the timing will be pretty close to original. If the engine sounds really flat, you need to advance the ignition by slackening the clamp and rotate the distributor anticlockwise a bit or, if the engine sounds rattly, retard it by moving distributor clockwise a tad. Road test until you are happy.
Gary Munn (GM Seven Services)