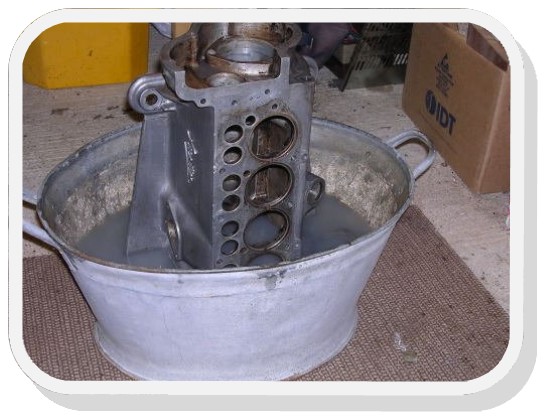
During the engine rebuild of the Pearl, the crankcase was found to be cracked near the top. Not impossible to repair, but instead a replacement of nearly the same vintage was sourced from the Seven Workshop, and work commenced cleaning it to a fit state. First step was removal of the resident sawdust and spiders, then a scrout with engine degreaser to remove 70 years worth of congealed oil. This left brown baked on deposits, which I tackled with more degreaser and non-metal tools such as sharpened wooden scrapers and
scotchbrite cleaning pads. All the oilway plugs were removed, including two internal ones which are peened over during manufacture. Make sure you Loctite these on reassembly - you don't want them falling out later. A set of 4 different sized bottle brushes from Frost Auto Restoration was very useful to clear black sludge from the oilways. Finally, the tin bath which we normally use to wash the dog after muddy walks was pressed into service for a final wash with very hot water and detergent. Some people recommend oven cleaner (caustic soda), but beware as this can attack aluminium and cause it to go grey. Beadblasting is another possibility, but there's a real risk of leaving abrasive residue behind - which is the last thing you want in a newly built
engine. Professional engine shops clean castings with machines resembling giant dishwashers - now there's an idea.........
Tappet Setting
The easiest way to set tappet clearances is with a clean, newly built engine on the bench, with no manifolds in the way. Unfortunately the normal situation is trying to peer into a black oily recess underneath the manifold ! The tappet screws develop recessed heads with long service, which makes getting a true feeler gauge reading difficult. The screw heads should be ground back flat if possible. Set the clearances to the recommended values for a cold engine, normally 6 thou for inlet and 7 thou for exhaust. In theory the gaps can be set at 4 thou for a hot engine, but I have never met anyone who can work quickly enough to do this whilst avoiding manifold burns. Too little clearance can lead to burnt exhaust valves (very bad), too much clearance leads to reduced valve opening and extra noise (moderately bad). If in doubt, err on the side of greater clearance. Numbering the valves from 1 to 9 starting at the front, the "rule of 9" may be used, i.e. when valve "x" is fully open, valve (9 minus x) may be adjusted.
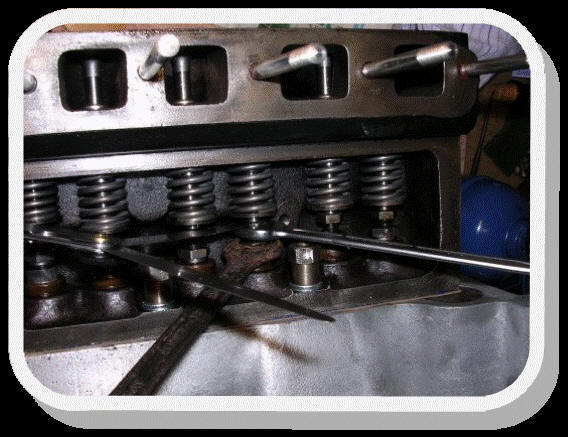
Valve 5 (exhaust) full open, adjust Valve 4 (exhaust)
Valve 2 (inlet) full open, adjust Valve 7 (inlet)
Valve 8 (exhaust) full open, adjust Valve 1(exhaust)
Valve 6 (inlet) full open, adjust Valve 3 (inlet)
Valve 4 (exhaust) full open, adjust Valve 5 (exhaust)
Valve 7 (inlet) full open, adjust Valve 2 (inlet)
Valve 1 (exhaust) full open, adjust Valve 8 (exhaust)
Valve 3 (inlet) full open, adjust Valve 6 (inlet)
Using the starting handle to turn the engine, the whole sequence above will take two full turns (easiest with sparking plugs removed). When slackening the locknut, only slacken enough to just be able to adjust the tappet screw. This reduces the tendency for the setting to slip when the locknut is retightened. One full turn of the screw represents about 40 thou, so to get within an accuracy of 1 or 2 thou its position must be quite precise.
John Cornforth DA7C