CLEANING THE A7 OIL RESERVOIR
From The Austin Magazine, February 1929
One of the must important attentions to be given to the car is to change the engine oil regularly. The handbook says it is advisable to drain all the oil after the first 500-800 miles. This is most important. After that it need only be changed every 1,200 to 1,500 miles (we are referring to the Austin "Seven"). Possibly no serious trouble would arise were the oil left in for several hundred miles more. But noticeable defects are not the only troubles an engine can suffer. Wear takes place over a period of time. How long that period is to be depends on what use and attention the engine receives and, as we have said, the most important attention is to change the oil regularly.
There is a step further in regard to
the engine lubrication. The handbook says: "Every 2,400 to 3,000 miles remove
the oil reservoir." This, too, is an attention of the first importance, although
it is not a frequent one. The reason why it is necessary to change the engine
oil is that owing to the wear and heat to which it is subject, it becomes thin,
loses its lubricating properties - in short, is lacking in viscosity. It also
collects dirt and minute particles of metal, all of which are abrasives. Now,
changing the oil will definitely cure the first of these two deficiencies, but
it will only remove such of the dirt and metal particles as are suspended in the
oil, with the addition, perhaps, of a small amount washed clear as the oil
drains out. Therefore, the further step of cleaning the oil reservoir and gauze
becomes advisable if the engine is to be thoroughly cleaned; and on this subject
it is our purpose to give a few hints as to the best way in which it can be
effected.
Firstly, a little before the time when it has been decided to change the oil and clean the oil reservoir and gauze, cease replenishing, allowing the level gradually to drop down the dipper rod towards the bottom as more miles are covered. As the oil level gets lower, keep a watch on the oil pressure button more frequently while driving so that if it should give any warning of' circulation failure, that warning will not be missed. Also, more frequently examine the oil level. It is quite in order if there is more than ¼ inch indicated above the bottom of the dipper rod. When the time comes to drain the oil, first loosen the reservoir drain plug (the forward one - the other drains the gearbox), while the engine is cold, using the ½ inch open-ended spanner supplied in the toot kit. Then the engine should be run until hot, before the plug is unscrewed. If the work is effected immediately after a run the engine will be at the right heat. Otherwise, the quickest way of getting the engine warm is to have a muff or cover over the radiator and to retard the ignition lever.
Before loosening the drain plug, look for any oil leaks round the reservoir joint or the plug. If there are any, this is a pretty good indication that new washers will be required. In any event it is always well to have a new reservoir joint washer in case the old one should be damaged during the work (it costs 1s. 2d.).
The drain plug is next removed. A tin or receptacle of some sort should be standing below it to catch the old oil when it comes out. The size of this tin will depend upon how much oil is in the reservoir and it is at this point that the advantage of running the car without making up the oil level is noticed.
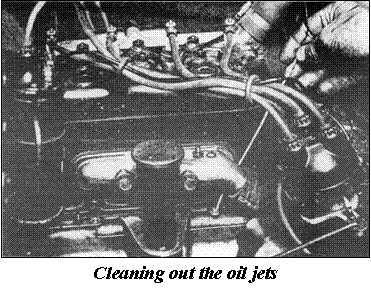
While the oil is draining clear there is another small attention to the lubricating system that can be made conveniently. This is to clear the oil jets. These jets are under the plugs on top of the crankcase on the oil-side. By unscrewing and removing the plugs the jets will be accessible. It can be ensured that they are clear by inserting a stiff piece of wire, about 1/16th inch in diameter, through each; and then the plugs can be replaced, not forgetting the washer under each. For this attention it is an advantage to remove the magneto distributor (if the car has magneto ignition) and place the distributor and ignition leads on the cylinder head out of the way of the spanner. Another attention, too, that can be given at this point, is to remove the oil filler gauze, wash it in petrol and replace it.
By this time the oil will have drained clear sufficiently for operations to be commenced on the reservoir. It is sometimes advised to jack up one side of the front axle to give more room to work, but this is hardly necessary with the "Seven" which has a generous ground clearance. But a very useful preliminary measure which can be taken is to turn the front wheels to their full lock as if the car were taking a corner to the left. This allows more room for the arms when working under the car, and it brings the steering cross tube forward towards the axle and makes the set screws at the front of the reservoir more accessible. It is best to work under the car from the off-side. Working from the near-side is unsatisfactory as it will be found that oil will drop from the pump for some time, and the drops will have to be dodged.
For removing the reservoir set screws, fourteen in number, use a ¼ -inch box spanner and a tommy bar. Although not essential, it is an advantage to start at one point, and remove the screws all round the reservoir, standing them in order, where they will not be knocked over, with the small oval plate and spring washer still on each so that each screw can be replaced in the hole it was taken from. Opposite the drain hole is a convenient point to start from. This is a small precaution, but one which will ensure the screws fitting satisfactorily and allow the reservoir joint to be made tight when reassembling.
With the screws removed, the reservoir can be withdrawn from the crankcase. If it is difficult to pull away, see if it is being held by the frame at the front end. This sometimes happens, especially if the engine has been taken out of the chassis at any time, when the front lip of the reservoir may have been bent outward. By working the reservoir sideways several times in each direction, it will come away from the frame. If this is not successful, carefully prise it clear. Care is required or the joint washer will be damaged.
Access to the gauze filter is now possible. It is secured by ten set screws with spring washers, and these can he removed, using the same spanner as the reservoir set screws.
Both the reservoir and the gauze should be thoroughly washed in paraffin and petrol until
clean. A brush can be successfully used for these cleaning operations. A rag should not be used to remove the dirt as shreds of it are liable to get into the oil circulation system and cause a stoppage. The inside of the crankcase, where accessible, is cleaned; also the joint faces for the gauze and the oil reservoir.
Next, it is advisable to refit the drain plug in the oil reservoir so that it is not forgotten. It should have its washer in place and should be tightened well home. The joint washer (or a new one) to go between the reservoir and the crankcase should next be fitted on the reservoir, first having been greased on both sides. It should be placed carefully so that the holes are left clear for the set screws to be inserted.
The gauze is refitted inside the crankcase, the metal frame being on the underside. The ten set screws with their spring washers should be tightened a few turns at a time, beginning with those at the centre, and working towards those at the ends.
In refitting the reservoir, endeavour to get it into position without disturbing the joint washer, then insert two of the set screws, two diagonally opposite ones for preference to hold it. The others should be inserted, all of them in their correct holes with oval plate and spring washer in position. Tighten them all gradually with the box spanner and finally tighten them home, working from the centre screws to those at the ends. It is prudent to exercise care in finally tightening these and the gauze securing screws. Should one break off in the crankcase – which might result if undue or sudden force were used -it would be almost impossible to make a satisfactory oil-tight joint without drilling out the broken screw so that a new screw could be fitted. Particular care should be exercised to see that the joint is secure at the rear end, as it is there, if anywhere, that it is likely to leak.
About half-a-gallon of oil will be enough to fill the reservoir up to the "full" mark on the dipper rod. When filling be careful not to drop oil in the magneto and always use the filler gauze.
Before the engine is started it should be cranked over for several revolutions with the ignition switch off to ensure that the oil is beginning to circulate and when started should only be run for a few minutes, the circulation being verified by watching the button on the dash.
After the car has run a few miles it is a good plan to go over the reservoir set screws again to ensure that they are tight, and to look for any oil leaks, particularly at the rear of the reservoir. If the reservoir is leaking, there will be oil on the garage floor after the car has stood overnight; this should be watched for. A slight leak can usually be checked by further tightening the adjacent set screws, but if this is not successful it will be necessary to take down the reservoir again and re-make the joint, perhaps using a new joint washer. Remember when tightening the screws only to use moderate force.