An enlargement of a portion of the roof framework is illustrated in Fig
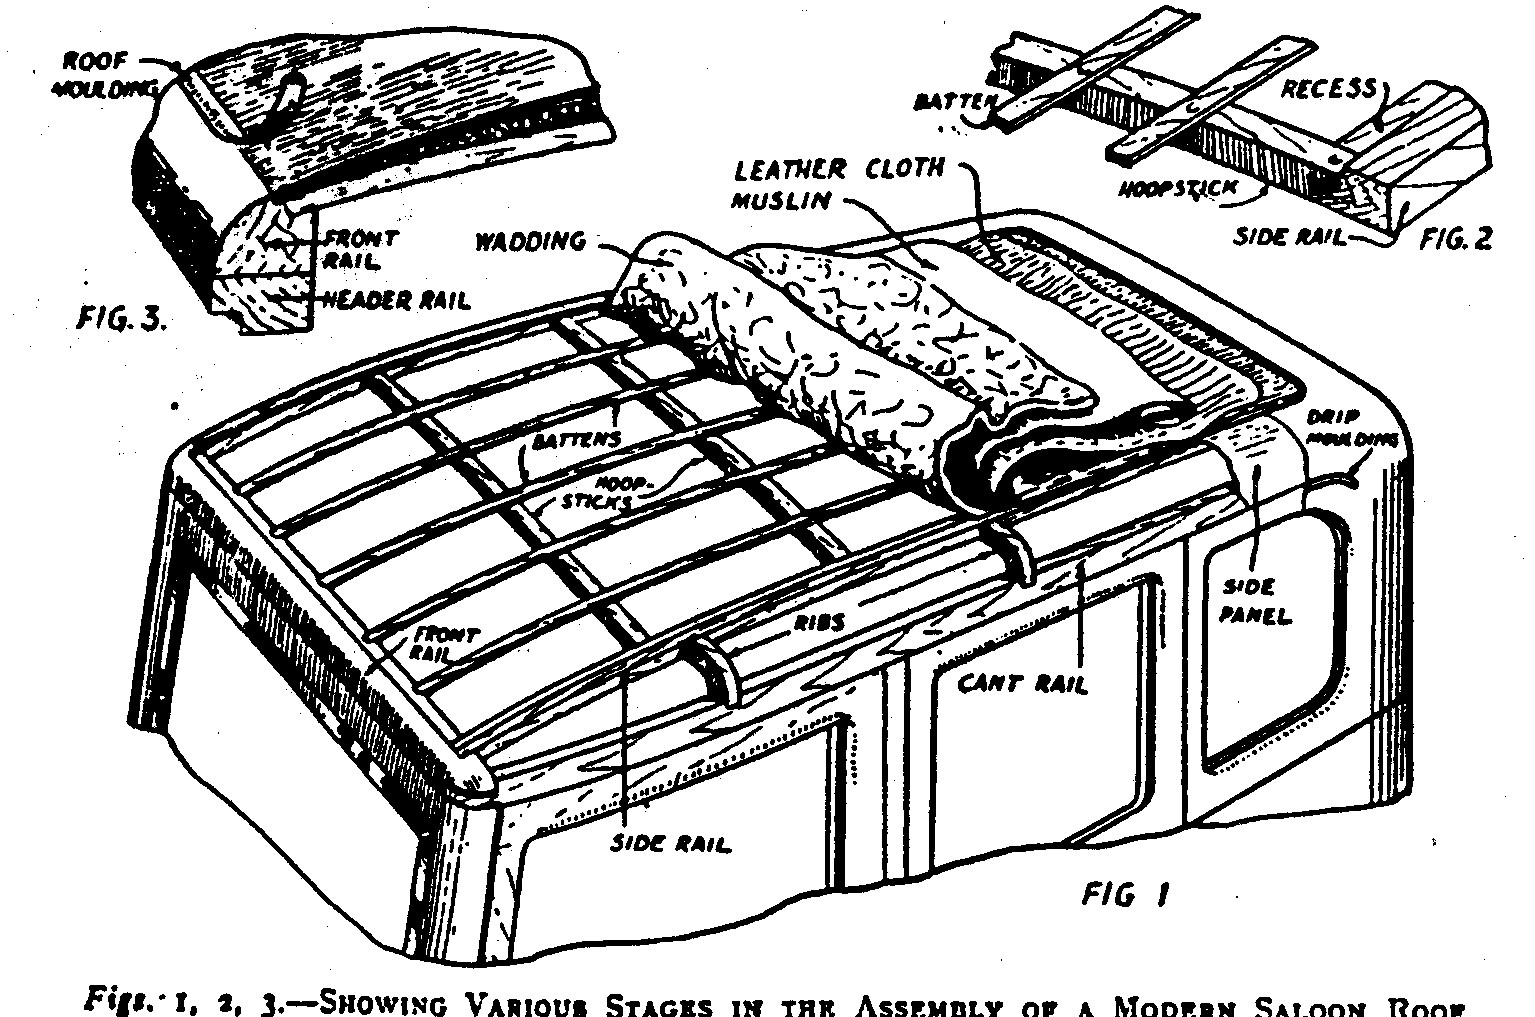 .
2. It will be noted that the side rail is recessed so that there is a flush
surface when the roof cover is placed in position. The side rails and battens
are lapped into the front rail above the screen and the edge of the roof
material is hidden by a metal moulding as shown in Fig. 3. There is a similar
rail and method of fixing across the back of the roof.
.
2. It will be noted that the side rail is recessed so that there is a flush
surface when the roof cover is placed in position. The side rails and battens
are lapped into the front rail above the screen and the edge of the roof
material is hidden by a metal moulding as shown in Fig. 3. There is a similar
rail and method of fixing across the back of the roof.Defects Likely to Arise.
Any part of the roof framework may be cracked or broken. A screw or nail may work loose, which although it may not allow water to come through, yet squeaking and chafing are set up which wear the surrounding parts. The fabric covering may become dull and may often be renovated by the use of a suitable paint or dressing which saves the expense of renewal.
Repairing a Broken Front Rail.
Fig. 4 illustrates the various parts which have to be detached when the wooden rail above the screen is broken. The screen is removed by unscrewing the side irons from the front pillars. The broken front rail consists of a header rail, grooved for the top
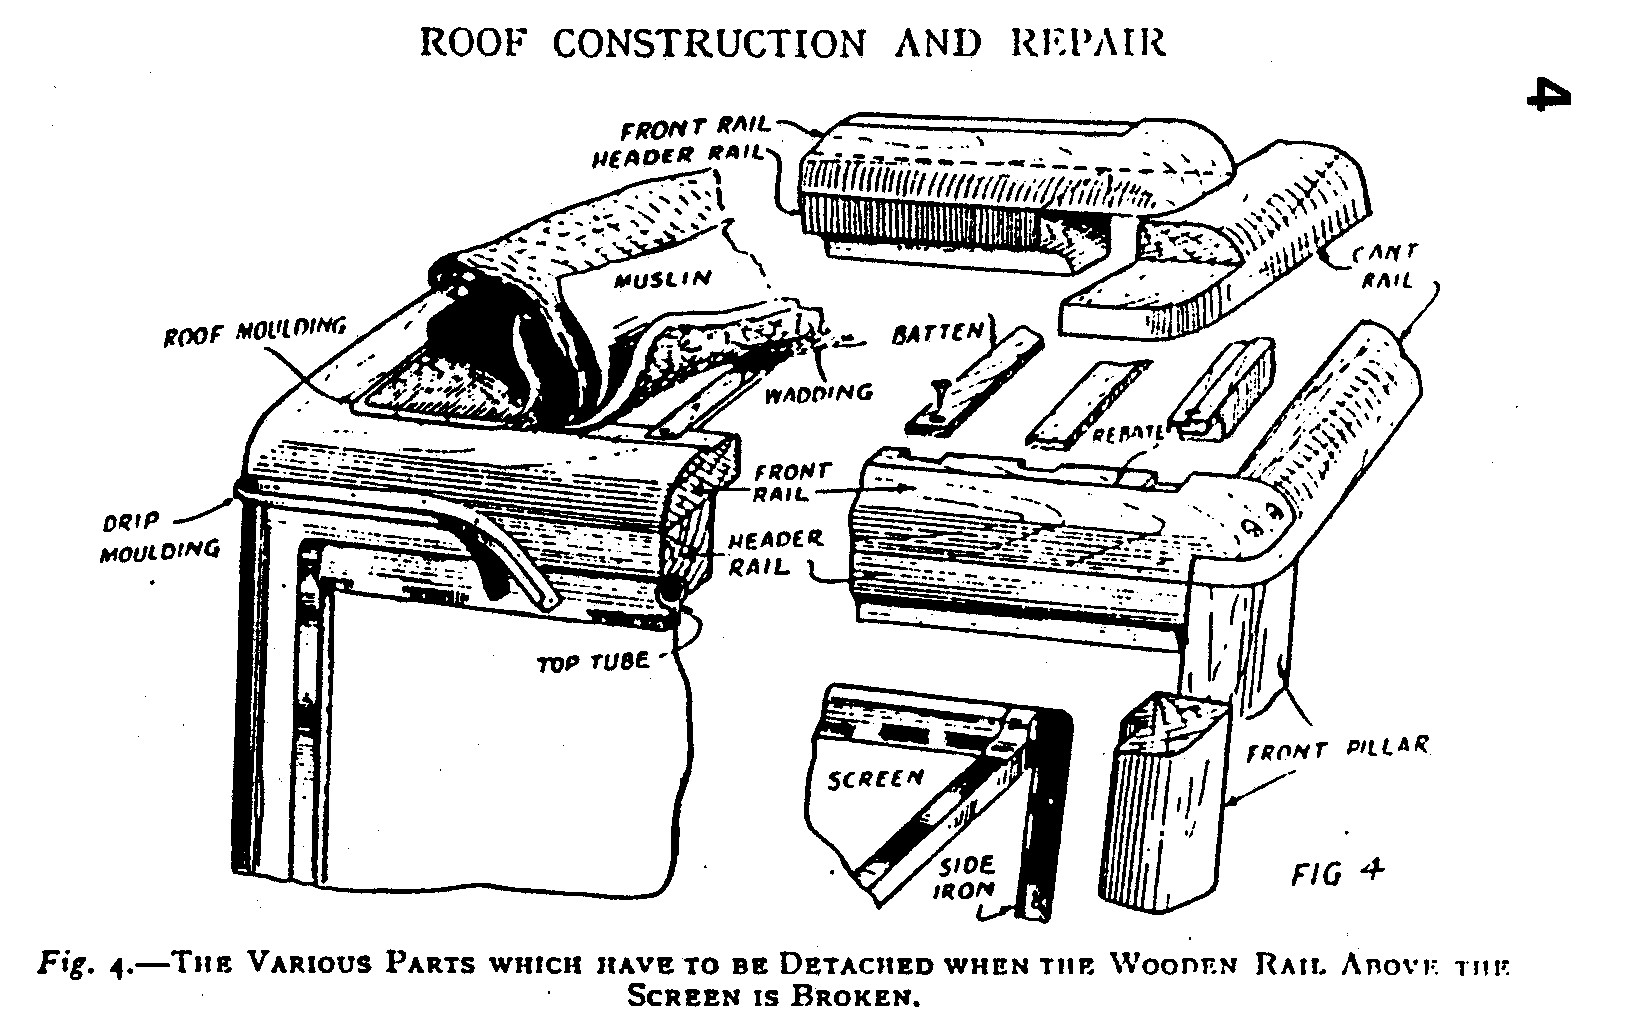 tube of the screen, and a rail above it shaped to the roof curve. This is
rebated on its back edge for the roof cover in a similar manner to the side
rails already described.
tube of the screen, and a rail above it shaped to the roof curve. This is
rebated on its back edge for the roof cover in a similar manner to the side
rails already described.To release the front rail the drip moulding is unfastened. The roof cover is released by lifting the moulding which secures its edges. This moulding is also shown in Fig. 3. The roof cover usually consists of a pad of cotton wadding overlaid with muslin which is immediately under the leather cloth. Often the wadding lies on a foundation of wire netting which is fixed with staples at the edges. Netting and woodwork do not come in contact, because there is a layer, of felt between them.
After undoing the roof lining, a portion of each side roof panel is unfastened. Then the front rail is unscrewed at the ends from the cant rail and the ends of all lengthwise members released. A new rail is made with the old one used as a pattern.
By adopting a lap joint as shown in Fig. t, the new rail is easily inserted from above. To strengthen the joint between the front rail and cant rail, small plates may he screwed on the inside corners. The side panels and roof cover are re-fixed, also the drip moulding, after which the. screen is inserted and the roof
 lining replaced.
Splicing a Broken Cant Rail.
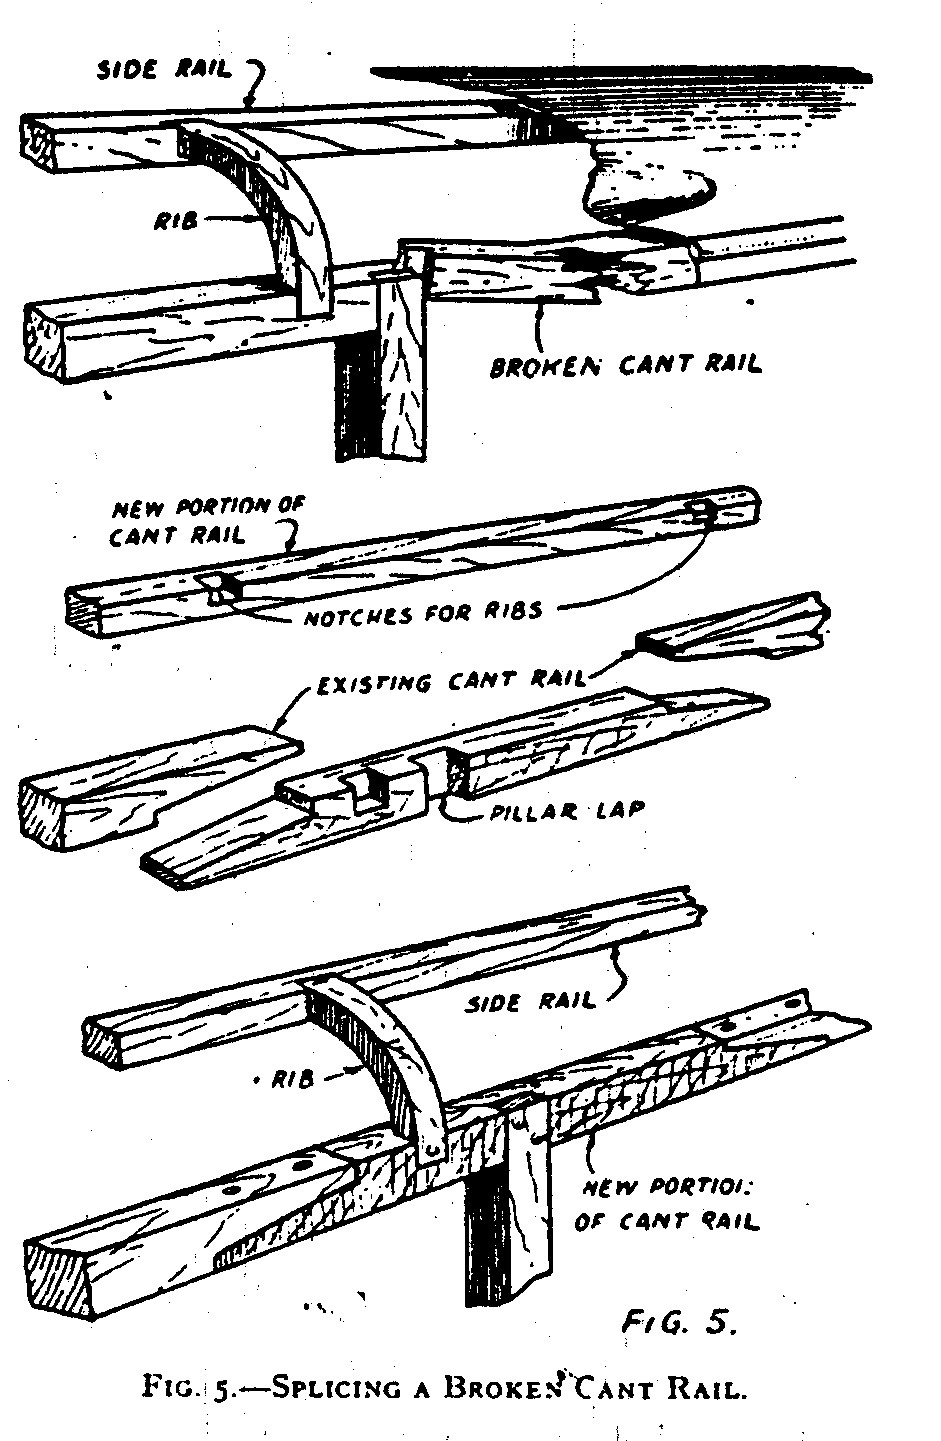
The top illustration in Fig. 5 shows a broken cant rail and it is proposed to splice it instead of inserting a new rail throughout. After removing the drip moulding, also the roof lining around the damaged area, the cant rail is sawn through each side of the fracture. A new cant rail section is prepared which, as shown in Fig. 5, is first notched for the ends of the side panel ribs.
If the portion of cant rail to be replaced includes a joint with a body or standing pillar, then the new rail is lapped or mortised for this pillar. The exposed ends of the existing cant rail are next cut for a splice and the new piece is shaped accordingly. The splice at each end is cut so that it may be fitted from underneath. At the bottom of Fig. 5 the new portion of rail has been screwed into position.
Re-covering the Roof.
If the roof leaks badly, the only remedy is a new cover. After removing the metal moulding all round the edges, the tacks are released which fasten the material to the wooden framework. When the wadding is taken off, the roof should be examined for any defective places. Test each joint of the battens with the hoopsticks to ascertain that all is secure.
The leather cloth is cut to size with an allowance of 11/2 in. all round, so that it is both 3 in. longer, and wider than the roof opening. A good method of stretching the cover into position is to tack it first in the centre of the front and back edges, then at a corner, followed by tacks in the diagonally opposite corner. After this the other corners are secured. The next stage is to complete the tacking of the front, then the back and finally the sides. Here the tacking proceeds from the centre to the ends. When the edges of the cover have been trimmed it is then ready for its moulding.
Root Mouldings.
It is advisable to use new metal mouldings rather than attempt to replace the old one. The moulding which conceals the edges of the roof cover usually has a flange. This is folded over the part where the nails or screws are placed so that the heads of the fastenings are hidden. This flange is secured in place neatly by hammering it down with a piece of wood which is shaped on the underside to fit the moulding when closed.
The drip moulding, or roof guttering, is made in a similar manner. It has an upper lip or flange for folding and a channel at the bottom which forms the water gutter.
This can be seen clearly in the illustration on the previous page.
Reviving a Roof Cover.
To revive a roof cover which is shabby but waterproof, it is first scrubbed with soap and water, well rinsed and wiped dry with a cloth. Any unevenness of surface is corrected with fine sandpaper applied gently, because care must be taken not to create any thin places. After dusting the roof, a coat of dressing or paint is brushed on. This paint may be purchased specially prepared for the work. The first coat is allowed to soak in thoroughly, at least overnight, then it is ready for a second coat, which, when dry, may receive a coat of wax polish.